Ruined Military Bunker: Difference between revisions
No edit summary |
m (Added a warning note about the expiration of the bunker location) |
||
| Line 4: | Line 4: | ||
First, you find a dead guy under a tree. This encounter appears to be only a slight variation of an otherwise routine random encounter, so it has happened that some players exit quickly without investigating, and thus they miss their opportunity. But if you click the dead guy under a tree, you get some information - a location elsewhere on the map. When you look for it, you find a medium-sized map marker circle somewhere on the [[The World|worldmap]]. Look around [[Broken Hills]], north of [[Junktown]], around [[Shady Sands]], or even underneath [[Necropolis]]. | First, you find a dead guy under a tree. This encounter appears to be only a slight variation of an otherwise routine random encounter, so it has happened that some players exit quickly without investigating, and thus they miss their opportunity. But if you click the dead guy under a tree, you get some information - a location elsewhere on the map. When you look for it, you find a medium-sized map marker circle somewhere on the [[The World|worldmap]]. Look around [[Broken Hills]], north of [[Junktown]], around [[Shady Sands]], or even underneath [[Necropolis]]. | ||
'''NOTE''': <span style="color:red">'''The location of the bunker will be visible on World Map for only 24 REAL HOURS!'''</span> '''When it expires, it will disappear even if there are players currently inside it!''' | |||
==The Bunker== | ==The Bunker== | ||
Revision as of 17:21, 18 March 2020
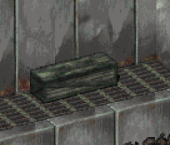
An abandoned military bunker. You can see the big gates from the distance.
All players should watch out when traveling on the map, to find this awesome Special Encounter.
First, you find a dead guy under a tree. This encounter appears to be only a slight variation of an otherwise routine random encounter, so it has happened that some players exit quickly without investigating, and thus they miss their opportunity. But if you click the dead guy under a tree, you get some information - a location elsewhere on the map. When you look for it, you find a medium-sized map marker circle somewhere on the worldmap. Look around Broken Hills, north of Junktown, around Shady Sands, or even underneath Necropolis. NOTE: The location of the bunker will be visible on World Map for only 24 REAL HOURS! When it expires, it will disappear even if there are players currently inside it!
The Bunker
When you go there, it is protected by a stationary dual-gun turret. Defeat the turret to get in. Run up closer and you find a dead body with a tubular key. That heavy doorway into the mountain will not open yet, even with that key, but you're on the right track. You need to search inside the outer buildings first. Find some Electronic Parts there to get the generator working, and get 1500 xp. You might get shocked by the circuits in the process. Next use a repair tool on the machinery, and get 3500 more xp. With the generator working, now try using the key on the door console. The key gets jammed in the control board, but it works - you've opened the door into the bunker's dangerous insides!
As you navigate this adventure, watch out for three Holotapes along the way. Upload them as you find them and pause to read them in your Pip-Boy Archives. They tell some of the background story.
On the inside, the lights are off, so it's a bit dark. The lack of power is also why the elevator doesn't work. Doors are locked and won't open, even with plastic explosives. You need some special keys! What you need to do next is get into the control room, but be warned: it is intensely radiated! This place makes Glow look like a cakewalk. Use a certain computer terminal to open the airlock door. You'll need to have some decent Science skill for this next part. If you have high Science skill, pop a Rad-X but don't even bother with RadAway. Just plan on spending some caps in Junktown to get rid of 67% rads or whatever you get doing this. The airlock doors are interesting; when one opens, the other closes. Once inside, you're already dying of radiation, so do not stand around in there. Run straight into the center room, find the terminal that works, and if your Science skill is good enough, you should get some long dialogue options with the terminal.
| Terminal Dialogue |
|---|
|
If you try the terminal and you do not get these dialogue options, but rather you get a quick ending that suggests you need a manual, then it means your Science is not high enough. Find a friend with better Science skill. Step through the options and pay attention to what it says. If you do this correctly, the power is almost on! Run next from the terminal straight for the generators. If you click the correct control panel, the lights will go on. (Might need to use Repair/Science?).
Get out of that radiated area and watch out for the Mr Handy robot - it powered up when you fixed the lights. Now get to Junktown and pay the doctor to get rid of your rads. At 10% or higher, you lose a SPECIAL point. At 20% you lose another SPECIAL point. You need to be full strength to fight the robots in the basement.
The elevator works now that the lights are on. Head down to level 2 but be ready for a tough fight. It might work best if you go in with all of the following: Good armor, Pancor Jackhammer in good condition loaded with EMP shells, full drugs including Psycho, and a team of friends all with the same. A couple things you should know:
- Watch for wall safes. There are more than one, and some important items are found in them.
- When you first hit level 2, the energy doors are off, and other doors are locked. Work the switch in the upper room to get it all working. The energy doors stay activated for a while and then turn off again, during which time you can get through them with Science/Repair.
- There is a computer terminal that activates the mega-robot. You don't have to activate it while you're still fighting the other bots - they are hard enough. If you bring wild friends, chances are one of them will do this just to see what happens and your fight just got tougher.
- Watch out for color-coded pass keys. A yellow one is found outside and gets used to open the main bunker doors. A red one and two blue ones are found inside. One of the blue ones opens the medical/infirmary door, but the key "gets jammed" in the doorlock mechanism so it disappears from your inventory. The other blue key though does not. So 5 keys altogether, and you get out with 3.
- You get a random implant from a wall safe in the best locker room which is back on level 1, access to which is gained probably from the 2nd blue key you get on level 2.
- You get a random high-tier armor in 100% condition, with a chance that it's a Power Armor or Hardened Power Armor, but may be red NCR Ranger Armor.
- You get some random high-tier guns too, which might be a gatling laser, Gauss rifle, a pulse rifle, etc.
- There are also some locked containers in the bottom room where the boss robot was stationed. You can get a unique bridgekeepers robe there, or some other random rare item(s).
Suggested Best Practice
When you begin accessing the bunker location, expect to suffer combat failures. Bring extra gear there and arrange it in ready-piles so when you return you can do so strong. Include sstims and ammo. Build a tent next to it and make a map there. Share the map with trusted friends so they can regroup there and you can drag them back to the fight more easily.
Fighting the Big Boss
If you are trying this solo, and you only wish to get the loot in his room, you can lure him up to the top of the level into the office if you can get that far without dying. Don't be equipped with anything important. When he beats you there, he stays put. So when you come back, you can run into his room without disturbing him and access his footlockers.
