Guide Sandbox
This is a step-by-step structured route through quest content, to level up new players who want to survive while they explore and get stronger. It should work pretty well, down to "STOP".
This guide starts you in Hub and surrounding area, completing easy tasks. Then you venture abroad, go north, return with a car, and use it to advance. You'll level up, get more Perks, make Caps and buy Skill Books, establish a base and set up a Safe House network all over the map. You'll recruit some NPC followers, and get into tougher fights. Later, you'll power-level additional Characters, using a leveling build, and learn to use the Reroll feature. Your next characters will start faster with immediate access to your whole network, gear and Vehicles, all prepared in advance by the lead character you start with using in this guide.
PROJECT STATUS: Jan 2024, Levels 1-12 should work fairly well. In re-work yet again to include a few more advantages before venturing north. Prior to this, it was tested 30+ times from 2020 to get best results.
Description, Advice, Config Stuff
- Lander's Point is an amazing tutorial camp feature for new people who do not use a guide like this one. This guide skips it, so you go straight into the real world
- The game has an excellent Item Highlighter, which makes it much easier to see items on the ground, boxes and bookshelves that can be searched, resources that can be harvested, etc.
- Right-click your game client Desktop shortcut, go to Properties and Open File Location. Then Edit the Reloaded.cfg file
- In the "Reloaded" section, find (or add) the line called "ShowItemContours=" and set that to 3. Save the file, close the game client and re-launch
- Or you can use a player-provided tool, possibly obtained via the game forum, like FallCraftPlus.zip, (last working link)
- Let's set your combat mode to Real-Time (trust me) by using this in-game command: ~combatmode rt (run in RT mode for now, to stay alive and exit encounters quickly)
- You can set Combat Mode to Real-Time by default, so you don't have to manually type this command each time you log into the game, via FOConfig.exe
- Your progress will vary from the XP and Caps targets in this guide. It will be close, but it will not match exactly. Don't worry about that - just keep pushing through the "harsh".
The First Character Build
This first character will become your base commander to support your additional characters, but starts out as a lone survivalist. He is tough, and uses Combat Shotguns and all other Small Guns weaponry.
| PvE | The Porter/Payback Build | |||||
|---|---|---|---|---|---|---|
| S | P | E | C | I | A | L |
| 7 | 1 | 10 | 1 | 10 | 10 | 1 |
| Traits: | Good Natured | Heavy Handed | ||||
| Tag Skills: | Small Guns | Close Combat | Outdoorsman | |||
Strength 7 (10 on Drugs, for good Carry Weight)
Perception 1 (he is not a sniper - that's later)
Endurance 10 (for max HP)
Charisma 1 (can get 3 Companion Followers later, depending on Speech)
Intelligence 10 (Swift Learner +10% XP, and Educated for Skill Points overload!)
Agility 10 (for max combat speed)
Luck 1 (nobody can have it all)
Traits: Good Natured (to recruit more followers sooner) + Heavy Handed to punch so hard when you need to, you often knock your opponents down
Tags: Small Guns, Close Combat, Outdoorsman
This is the build for this guide. It uses Small Guns like Combat Shotguns, pistols, and SMGs. With some Levels, recruit NPC companions and build a combat support team to follow you and back you up in fights. Your combat-capable lead Character will move around easily on The World map, dive into most of the Quests, and sets up for your expansion, which will include additional Characters like Big-Gunners, long-range Snipers, Energy Experts, Close Combat Specialists, and more.
| CHAPTER 1: This adventure begins... |
- ✓Register, record your password somewhere, log in, and you're standing in a cave (Fig. 1), just outside your vault
- ✓Your overseer sent you out for a reason, and you're not sure what it is, or even that you trust him, but there's no way back in. Your adventure is beginning...
- ✓Press your + (plus) key several times to brighten up your surroundings (Fig. 2). You can check the bones nearby. Nothing. Does that control panel work? Nope. Take one last look at your old home
- ✓There's only one way to go - run out of the cave. First though, press your Q button to show your view range and notice the lines that light up on the ground
- While you can see a lot farther than these lines, they indicate certain limits in how far you can see certain things, including potential combat targets
- ✓Exit the cave. When prompted about a settlement, choose to "head out into the wasteland" (Fig. 3)
- Your overseer sent you out without any gear, and you might be expected to go to Lander's Point, but you don't trust that plan. You think for yourself, and you're willing to risk cutting your own path
- ✓Outside the cave, get 2 quests from the Startled Caravan Driver (Fig. 4) (all dialogue option 1 until done), and press P twice to verify both quests are listed: Into the Great Wide Open and Far Go Scout

|

|

|

|

|
| Fig. 1: It's dark outside your vault | Fig. 2: (Not as dark) | Fig. 3: Head out into the wasteland | Fig. 4: 0/61 Party Points | Fig. 5: Head to the Exit Grid |
- ✓Also, press your ENTER key to open the chat bar, and type this command (Fig. 4) to verify your Party Points are 0/61: ~pp
- ✓If you did not set your combat mode in FOConfig.exe, then type: ~combatmode rt to switch to Real-Time for now while you're just trying to stay alive. Run Turn-Based if you prefer, but later when you're stronger (Fig. 4)
- ✓Press F5 to expand your text box area, to see more notifications, and type ~online to see how many player Characters are logged in right now - you can chat with them once you find a Radio
- ✓Run to the Exit Grid (Fig. 5) to hit The World map and press C to open your Character profile and review some info - click "Expand" below to see a block of info for level 1:
| Level 1 | Skills | Reps | 0/8 Primary Perks | 0/22 Support Perks | Quests | Notes |
|---|---|---|---|---|---|---|
82/287 HP 00 XP 0 Caps 110 CW DR 00 PR 30 RR 20 PP 0/61 |
Small Guns 65 Close Combat 84 Throwing 40 First Aid 22 Doctor 16 Lockpick 21 Traps 21 Science 40 Repair 30 Speech 5 Barter 4 Outdoorsman 60 |
Wanderer Hub 0 |
(none yet) Adrenaline Rush Toughness Even Tougher Lifegiver Lifegiver Bonus Rate of Attack Lifegiver Action Boy Crafting Professions: Small Guns 1 Doctor 1 |
(none yet) Swift Learner Gecko Skinning Boneyard Guard Dead Man Walking Pathfinder Treasure Hunter Strong Back Pack Rat Light Step Explorer Scout Ranger |
+Into the Great Wide Open +Far Go Scout The Gun Runner Delivery A Tent in the Wasteland No Child Left Behind Find Joseph Pandora's Box Hello City Wasteland Band A Light in the Darkness The Anguished man Old Traditions Ol' Yeller |
So far I have no weapons, no Caps, no Tools, no armor and no medical supplies, nor even any Skills. Heck I bet I would break a gun if I tried to shoot one right now. But...I can see lights from the town nearby called Hub. I should set up a safe place near here. New Goal: Build my personal headquarters and... New Goal: Establish Radio communication with the rest of the world To Do: Find these tools...       
|
| Legend: | + and bold = Skills recently boosted, and Quests recently added, Bold Skills = The 3 Skills you tagged at registration, Linked Blue Quests = Active/Incomplete Quests, Gray Text = content not yet discovered | |||||
- ✓Well, there's good news, and there's bad news. Which one do you want first?
- The good news is, you're alive and healthy. You're not Poisoned or Radiated, nor are you overloaded. You can run, and you already have 2 jobs to do, and there's a town nearby
- The bad news is, you're fragile with only 82 HP (out of 287), you have low Resistances, you have no tools, no weapons or ammo or armor, and no instructions. You're totally vulnerable, running around in a blue utility suit.
- ✓Your appearance screams Hey look at me! I'm new here! You have no combat skills worth using yet, and you'll likely break a gun if you try to use it.
- ✓Pretend you can blend in wearing this attire, and walk to Hub (Fig. 6), but avoid all random encounters for now. Be ready to run for the Exit Grid immediately if forced into any
- ✓Over Hub, use your Town/World Button (Fig. 7) (bottom right of world map screen) to Preview Hub, and enter via the Water Merchants entrance

|

|

|

|

|
| Fig. 6: Over Hub | Fig. 7: Use Town/World button | Fig. 8: Run north thru Market | Fig. 9: Turn left at the Post Office | Fig. 10: Go to the brahmin pens |
- ✓Priority 1: Before even leveling up much, you should establish your first personal HQ just outside of town, which will be a safe place to keep gear, so...
- ✓Rummaging: check every desk, every bookshelf, crate, pool table, refrigerator, etc for all items you can find, and ignore the ones that are locked. You're mainly looking for stuff to sell for Caps, and these items to keep:
- You need a Hatchet and 8 Brahmin Hides asap to craft a Folded Tent so you can set up a secure place to keep things
- You also need to find and keep 1 Wrench, a Water Bag, a Radio, 2 Ropes, some Lockpicks, a Lighter, and a Knife or Combat Knife. Keep all Flint, Broc Flowers, Xander Roots, 10 Scorpion Tails, and all Molotov Cocktails
- You'll need Caps along the way too, and many items you can sell to get more Caps. Your first Caps target is 17k or more, so you can go buy a car
- ✓When you find a Radio, "USE" it to open its control panel (click-hold and drag popup menu down to the hand), and enable reception so you can hear player conversations - chat with them at your own risk
- ✓Use Control+1 to remove ceilings so you can see inside buildings more easily, and Control+2 as needed, and rummage thru all bookshelves and other furniture/items that might contain things of use
- There are three such containers in the upper-most building, then four more in the church (not counting the locked desk)
- Search south in the Water Merchants' main building which has a fridge and some bookshelves, and search the lower storehouse building, and a trunk in the street near the caravan
- Then across the street to the building with a bunch of locked lockers (you won't be able to open most locked containers yet, so skip them for now)
- ✓When done in Water Merchants, exit to the Market district and take note of the layout of Hub's Market area, +150 XP (Fig. 8):
- Four buildings in the middle, including the Gun Store, the Bank, the General Store, and the Book Store
- Far Go Traders above-right, Police Station to immediate right, the Maltese Falcon bar to left, Crimson Caravan office above that, and Post Office north of Market area
- ✓Press F4 to drop/raise your HUD, and note there are 3 Exit Grids in Market south:
- Head into the Police Station and rummage there and exit via their north door
- ✓Cross the street upward and rummage the Far Go Traders, then out and run left to rummage the Book Store, exit thw west door and run up across to the Crimson Caravan office and rummage what you can in there
- ✓Exit the Crimson Caravan and go south to rummage inside the General Store, and then inside the FLC bank
- ✓Now to the Gun Store and rummage there first, and sell items to Beth to get some Caps: for now, you can sell all items that are not on your list above
- Keep your best knife, 1 Hatchet, 1 Radio, 2 Ropes, 2 Lighters, 1 Crowbar, 2 Water Bags, 1 Lockpicks, and all of these:Broc Flowers, Xander Roots, Brahmin Hides, Scorpion Tails and gecko pelts
- Also keep all Molotov Cocktails, all 10mm and 12g ammo, all Flint, some "Jimmy Hats" (1 of each color), and all Talchem Keys
- Sell all healing powders, water bottles and food, extra tools, all other ammo (other than 12g Shotgun Shells and 10mm), Fuzzy Paintings,
- ✓To find 8 Brahmin Hides and these other priority items might take searching every container in Hub, then end up in Old Town where you can use the Workbench to craft some things
- ✓Even if you find all items on your list, keep rummaging to sell items for more Caps
- ✓Go back to the Book Store and buy 1 Big Book of Science from Mrs. Stapleton as soon as you get 1600 Caps or more. Check your Science skill - it's 40. Now read your book to boost your Science to 46
- ✓Exit the Book Store and run north up into the Post Office (large building) to rummage the kitchen first, and then the far left room with the 3 bookshelves
- ✓Rummage the middle room too, then the upper rooms, and exit the back door (near the Fridge) and go talk with the Brahmin Herdsman nearby
- ✓There at the Brahmin pens, talk with the Poo guy (Brahmin Herdsman) to get a job shoveling Poo
![]() Level Up! Distribute Skill Points: +4 to Science to get Science 50, and the rest into Outdoorsman from 60 to 102. Your Hit Points just increased by 5 so that's good news
Level Up! Distribute Skill Points: +4 to Science to get Science 50, and the rest into Outdoorsman from 60 to 102. Your Hit Points just increased by 5 so that's good news
| Level 2 | Skills | Reps | 0/8 Primary Perks | 0/22 Support Perks | Quests | Notes |
|---|---|---|---|---|---|---|
87/287 HP 1014 XP 500-2000 Caps 110 CW DR 00 PR 30 RR 20 PP 0/61 |
Small Guns 65 Close Combat 84 Throwing 40 First Aid 22 Doctor 16 Lockpick 21 Traps 21 +Science 50 Repair 30 Speech 5 Barter 4 +Outdoorsman 60 |
Hub 0 | (none yet) Adrenaline Rush Toughness Even Tougher Lifegiver Lifegiver Bonus Rate of Attack Lifegiver Action Boy Crafting Professions: Small Guns 1 Doctor 1 |
(none yet) Swift Learner Gecko Skinning Boneyard Guard Dead Man Walking Pathfinder Treasure Hunter Strong Back Pack Rat Light Step Explorer Scout Ranger |
Into the Great Wide Open Far Go Scout The Gun Runner Delivery A Tent in the Wasteland No Child Left Behind Find Joseph Pandora's Box Hello City Wasteland Band A Light in the Darkness The Anguished man Old Traditions Ol' Yeller |
That's enough poo! That's not how I want to live my life. Moving on... I need to start making contacts here and find out who does what. I need to get stronger before I venture out into the wild And I have to find ways to make enough Caps to buy some decent gear I do have some work to do so I better get moving. Active Goal: Establish personal HQ Completed Goal: Established Radio communication Active/Completed? Goal: Accumulate Standard Set of Tools New Goal: 17k Caps for a car, and more Levels 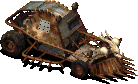
|
| Legend: | + and bold = Skills recently boosted, and Quests recently added, Bold Skills = The 3 Skills you tagged at registration, Linked Blue Quests = Active/Incomplete Quests, Gray Text = content not yet discovered | |||||
- ✓Report back to the Poo guy to get paid, +170 Caps
- ✓Next, talk with Dan in the nearby tent just north of the pens (Fig. 11). Talk with him twice to swap that Shovel for a tool of your choice (+100 XP):
- ✓Right there close to Dan's tent are some trees that yield Wood so chop twice into a tree to get 10 Wood. Press F to open the Fix-Boy, and craft 4 Sharpened Poles

|

|

|

|

|
| Fig. 11: Dan wants a shovel | Fig. 12: In the Fiber fields | Fig. 13: In the bookstore | Fig. 14: At the south Exit Grid | Fig. 15: Talking to the Captain |
- ✓Now that you have some Wood, and likely a Rope, you might be able to craft a Folded Tent - try that: Press F to open your Fix-Boy
- With 4 Sharpened Poles, if you have enough stuff, the Folded Tent item will highlight in the crafting list
- If you happen to have enough to make more than any Folded Tents, then go ahead and make as many of those as you can - chop more Wood as needed to have 3 leftover pieces of Wood
- If you have bad Luck finding things so far, and lack a Rope or enough (8) Brahmin Hides, hang on - you'll solve this problem Soon
- ✓In the fields across the street, there are 9 Fiber stalks mixed in with the other plants, so gather as much Fiber as you can, max 180 (Fig. 12)
- ✓From the farm fields, head south toward the Bookstore but stop and gather Fruit from the apple tree in front of the old fuel truck parked in the street
- ✓Next return to the Book Store to get Swift Learner from Mrs. Stapleton (ask to see books again but watch for Swift Learner dialogue option) (Fig. 13) - now you earn 10% more XP as you go!
- ✓From there, return to the gun store to sell unneeded Items, like Healing Powders, Shovels, Spears, but...
- Keep 12g Shotgun Shells and all 10mm ammo, and 2 Radios, your best knife, 1 Hatchet, all Gecko Pelts, Fibers, Fruit, Flint, Broc Flowers, Xander Roots, Scorpion Tails, and Talchem Keys
- Sell extra Radios, knives, melee weapons, Fuzzy Paintings, Booze and other food/drug items
- If needed, rummage around some more to get 8 Brahmin Hides, 2 Ropes, and a Radio, etc
- One nearly sure-fire way to get a few more Brahmin Hides in Old Town, is to use Science skill on the old computer in the east scrapyard to obtain Electrical Parts and sell them to Ferrarius in the Foundry
- ✓Once you have crafted a Folded Tent (209 XP), head to the south Exit Grid in Hub's Market, but stop to speak with the Traveling Merchant there to get the Gecko Skinning perk
- Exit Hub via the south Market Exit Grid, and go to Zone 30:39 to bottom right corner, go into an empty encounter, and "USE" your Folded Tent
- Congratulations! You now have a semi-safe place to store stuff. This your your personal headquarters for now - you'll be upgrading it to a Safe House soon enough, and later you'll get a private base
- ✓Add 3 Wood to the Fire Pit when you can, to upgrade the Fire Pit to a Campfire
- Once you have a Campfire and a Tool you can build a make-shift crude workbench mat where later you can craft Metal Parts, Alloys, and Gunpowder
- ✓At your Tent, use Shift+click on items in your Inventory, to make some piles:
- Make one pile of ammo, all types
- Drop all Junk and other raw Crafting materials in one hex (more hides, Metal Parts, Alloys, Wood, etc) but keep your Fibers on you
- Drop all Fruit in another hex along with medical bags, but keep all Broc/Xander, and keep 1 full Water Bag and any Stimpaks in your Inventory
- Make another pile just for spare Tools, Crowbars, Hatchets, Shovels, Ropes, your Sledgehammer and extra knives, but keep 1 Rope on you
- If you have any, drop all armor and weapons on another hex
- Drop odd/misc items you want to keep into a single pile on their own hex ("Jimmy Hats", Talchem Keys)
- ✓Let's go back into town for some easy XP and start leveling up. Keep a standard tool set on you:
- ✓When on the world map, notice a new map dot location near town - it's where an important quest will start soon, but skip it for now
- ✓Enter Hub again but this time use the main entrance (default), run down the street and talk to Captain Joe Kelly (in metal armor, Fig. 15) standing in the street (137 XP) and ask him about Custos, 82 XP + a few Items
- ✓Ask Joe about work killing rats too, to get a new location on your map, and then run up to the Caravan Packer guy (black man in a red shirt, Fig. 16)
- ✓Get a job from him moving boxes from the cart into the nearby hut (Fig. 16). Move the Boxes one-by-one and watch for the ***phew!*** overhead texts that indicate you're doing this correctly
- Note: Figure 16 below refers to "crates", but these are called Boxes everywhere else
- To get a Box, click his caravan cart, and get a message that "You've picked up a box from the caravan cart"
- One by one, you have to drop 10 heavy Boxes on the floor inside the hut, and not on the edge of the floor. If you do this wrong, the packer guy will yell at you in bold red
- When this is done incorrectly, and the packer guy yells in bold red, the person he's yelling at usually does not notice that, so watch for the purple ***phew!*** overhead text each time
- Another indication that you're doing it correctly, is the count-down message you get as you go from 10 Boxes down to 1 left to go, and then a ***stretches back*** overhead text when this task is done
- ✓Talk to the Caravan Packer guy again to get paid, +250 Caps, +6 Reputation in Hub, +1 to overall Karma, and +330 XP

|

|

|

|

|
| Fig. 16: Get a job moving heavy boxes | Fig. 17: Entering Old Town | Fig. 18: Talking to Jacob | Fig. 19: Making Rope at the Workbench | Fig. 20: Selling Ropes to Claire |
- ✓From there, run left over to the caravan and speak with "Anxious Caravan Guards" who each need something:
- ✓Find the Fruit tree behind the building just south of the caravan group, and harvest as much Fruit as you can (max +20 Fruit)
- ✓Chop some Wood from the trees nearby (some yield Wood) - get 50 Wood or more
- ✓On your way out of town, also stop at the Junk barrel at the caravan group and get enough Junk to make some Molotov Cocktails (how many Rot Guts you have divided by 2)
- ✓Exit Hub, notice the little map dot location just south of town - it is where Joe's rats are. You'll do that soon, but for now return to your tent and drop off the Wood, Junk, and Fruit
- ✓Go back into town, but this time enter Hub via Old Town entrance and notice the layout (Fig. 17):
- A foundry/machine shop with two garage doors, and Jacob's building on top, Workbench building at end of street
- Hub Tannery in the middle, the L-shaped building behind it with a basement, and a scrapyard area to far right
- ✓Go first to speak with Jacob about where gets his weapons, to get the The Gun Runner Delivery quest
- Ask Jacob where he gets his weapons (Fig. 18), and ask about his deal with Gun Runners
- Ask Jacob about Gun Runners, and choose dialogue option, "Sure, wanted to visit Gun Runners anyway"
- Ask him where to find Gun Runners, and he will highlight the location on your world map so you know exactly where you're going
- Ask Jacob where he gets his weapons (Fig. 18), and ask about his deal with Gun Runners
- ✓Next, go to the building with the Workbench and craft 36 Rope in 3 batches of 12 (set quantity to 12 in Fix-Boy), 396 XP
- ✓Slow-walk the Ropes to the Tannery building's door, but stop in the street to speak with the "Sad Little Girl" about her missing papa
- ✓Now go into the Tannery and sell the Ropes to Claire in 3 batches of 12, +1650 XP, +1080 Caps, and some Items
![]() Level Up! Choose Adrenaline Rush (or Quick Recovery), and distribute Skill Points: Outdoorsman 126 + Repair 31
Level Up! Choose Adrenaline Rush (or Quick Recovery), and distribute Skill Points: Outdoorsman 126 + Repair 31
| Level 3 | Skills | Reps | 1/8 Primary Perks | 1/22 Support Perks | Quests | Notes |
|---|---|---|---|---|---|---|
92/287 HP 4348 XP 1870 Caps 110 CW DR 00 PR 30 RR 20 PP 0/61 |
Small Guns 65 Close Combat 84 Throwing 40 First Aid 22 Doctor 16 Lockpick 21 Traps 21 Science 50 +Repair 31 Speech 5 Barter 4 +Outdoorsman 126 |
Wanderer Hub 47 |
+Adrenaline Rush Toughness Even Tougher Lifegiver Lifegiver Bonus Rate of Attack Lifegiver Action Boy Crafting Professions: Small Guns 1 Doctor 1 |
+Swift Learner Gecko Skinning Boneyard Guard Dead Man Walking Pathfinder Treasure Hunter Strong Back Pack Rat Light Step Explorer Scout Ranger |
Into the Great Wide Open Far Go Scout The Gun Runner Delivery A Tent in the Wasteland No Child Left Behind Find Joseph Pandora's Box Hello City Wasteland Band A Light in the Darkness The Anguished man Old Traditions Ol' Yeller |
This seems easy so far, but I hope my life isn't all work and no fun forever. At least I'm getting stronger Active Goal: Build Standard Tool Set Active Goal: 17k Caps for a car, and more Levels |
| Legend: | + and bold = Skills recently boosted, and Quests recently added, Bold Skills = The 3 Skills you tagged at registration, Linked Blue Quests = Active/Incomplete Quests, Gray Text = content not yet discovered | |||||
![]() Level Up! Distribute Skill Points: Outdoorsman to 142 and Repair 32
Level Up! Distribute Skill Points: Outdoorsman to 142 and Repair 32
| Level 4 | Skills | Reps | 1/8 Primary Perks | 1/22 Support Perks | Quests | Notes |
|---|---|---|---|---|---|---|
97/287 HP 6107 XP 2700 Caps 110 CW DR 00 PR 30 RR 20 PP 0/61 |
Small Guns 65 Close Combat 84 Throwing 40 First Aid 22 Doctor 16 Lockpick 21 Traps 21 Science 50 +Repair 32 Speech 5 Barter 4 +Outdoorsman 142 |
Wanderer Hub 10 |
Adrenaline Rush Toughness Even Tougher Lifegiver Lifegiver Bonus Rate of Attack Lifegiver Action Boy Crafting Professions: Small Guns 1 Doctor 1 |
Gecko Skinning Boneyard Guard Dead Man Walking Pathfinder Treasure Hunter Strong Back Pack Rat Light Step Explorer Scout Ranger |
Into the Great Wide Open Far Go Scout The Gun Runner Delivery A Tent in the Wasteland No Child Left Behind Find Joseph Pandora's Box Hello City The Wasteland Band A Light in the Darkness The Anguished man Old Traditions Ol' Yeller |
With gun skill as low as mine, my guns would explode if I tried shooting anything, but surely there's more to this world than all this basic labor. Pressing on... Active Goal: Exceed 17k Caps, and always more Levels |
| Legend: | + and bold = Skills recently boosted, and Quests recently added, Bold Skills = The 3 Skills you tagged at registration, Linked Blue Quests = Active/Incomplete Quests, Gray Text = content not yet discovered | |||||
- ✓Craft one final batch of 12 Ropes if you have enough Fiber (+132 XP), but run straight to the scrapyard area and use your Science skill on the old computer outside of the workbench building
- Gather up to 25 Electronic Parts (or less if you or anyone else recently harvested here)
- ✓Sell the last 12 Ropes to Claire, and take the eParts to the Foundry building near the Exit Grid
- Speak with Ferrarius about his Bulk Orders to sell eParts in batches of 8, for up to 1650 XP +some items
- ✓Hopefully you have a Tool by now, but either way scavenge and Rummage as you can starting in the Foundry, then back to the Tannery, then into the L-shaped building and into the basement
- You get 2 attempts to Scavenge per node, to find raw materials, so click each node twice. If you try to scavenge a node 3 times, notice the message is "There is nothing here right now"
- Sometimes you find stuff, but sometimes you get the message "You've found nothing of use". If a node is depleted, you get, "There is nothing here right now"
- NOTE: In Old Town alone, there are 41 Scavenging nodes plus 35 places to rummage, counting the basement, so get as much as you can and expect to get overloaded
- You get 2 attempts to Scavenge per node, to find raw materials, so click each node twice. If you try to scavenge a node 3 times, notice the message is "There is nothing here right now"
- ✓Find the thief in the basement and trade Lockpicks for a Tool if you don't have one yet, or a Leather Jacket if you do, 880 XP
- ✓Now that you have a Tool, you can Scavenge while you rummage. Click each Scavenging node twice
- ✓Notice that your Scavenging skill starts at 0, but it goes up naturally as you successfully use the skill
- ✓Press Control+1 and Control+2 to drop ceilings and walls to see better
- ✓Scavenge the basement and check the bookshelves, go back up and harvest the rest of the L-shaped building
- ✓Run north across the street and harvest everything you can find from Jacob's building, and then proceed back to the Workbench. Scav/Rummage there and then...
- ✓Use the Workbench to craft 1 Leather Helmet (+60 XP) and 1 9mm Mauser (+93 XP), and as many Molotov Cocktails as you can (maybe +150 XP)
- Whenever you click a Workbench, you get the Fix-Boy interface. Change the quantity as needed (or use the "Fix All" button), and use the scroll-down arrows to find Rope and Folded Tent in the list
- If you click the Workbench and do not get the Fix-Boy crafting interface, you clicked too high up on the toolboard
![]() Level Up! Distribute Skill Points: Outdoorsman 150 and Doctor 29
Level Up! Distribute Skill Points: Outdoorsman 150 and Doctor 29
| Level 5 | Skills | Reps | 1/8 Primary Perks | 1/22 Support Perks | Quests | Notes |
|---|---|---|---|---|---|---|
102/287 HP 5,461 XP 6158 Caps 110 CW DR 00 PR 30 RR 20 PP 0/61 |
Small Guns 65 Close Combat 84 Throwing 40 First Aid 22 +Doctor 29 Lockpick 21 Traps 21 Science 50 Repair 32 Speech 5 Barter 4 +Outdoorsman 150 |
Wanderer Hub 10 |
Adrenaline Rush Toughness Even Tougher Lifegiver Lifegiver Bonus Rate of Attack Lifegiver Action Boy Crafting Professions: Small Guns 1 Doctor 1 |
Gecko Skinning Boneyard Guard Dead Man Walking Pathfinder Treasure Hunter Strong Back Pack Rat Light Step Explorer Scout Ranger |
Into the Great Wide Open Far Go Scout +The Gun Runner Delivery A Tent in the Wasteland +No Child Left Behind +Find Joseph Hello City The Wasteland Band A Light in the Darkness The Anguished man Old Traditions Ol' Yeller |
Ropes are heavy, but this has been good experience Active Goal: Exceed 17k Caps, and always more Levels |
| Legend: | + and bold = Skills recently boosted, and Quests recently added, Bold Skills = The 3 Skills you tagged at registration, Linked Blue Quests = Active/Incomplete Quests, Gray Text = content not yet discovered | |||||
- When done at the Workbench, Scavenge the scrapyard area, and work your way down to the lower building
- South of the scrapyard area in the south-most building near an NCR poster, find and speak with the "Sad Wife" about a job to find her missing husband (Find Joseph)
- Scav in the Sad Wife's building, and then across the street west, checking that table in the street, and into the southwest building, noting the location of the "Dirty Old Man" in a back room
- ✓Get in the habit of always checking the newspaper machines until you find a Cat's Paw Magazine, the wasteland's leading cat enthusiast periodical. You deliver one later for XP
- ✓Move up one building and check the pool table, and exit, go north and check the last few nodes as you exit Old Town
- ✓Exit Old Town and Scavenge the newspaper machine right there, and gather Fruit from the tree too
- ✓Then go into Far Go Traders to deliver that message from the Startled Caravan Driver you met when you started, to Mitch (complete Far Go Scout, 440 XP +120 Caps)
- ✓Ask him about work too, to get the Hello City quest, and search his place for stuff you can use
- ✓From Far Go Traders, go straight to the Gun Store and sell some stuff to Beth same as before but keep all Leather Jackets, and 1 9mm Mauser if you have any
- ✓Exit the Gun Store and return to the Book Store and buy 3 Dean's Electronics books, and read them. Note your Repair skill should now be at 50
- ✓Exit the Book Store and exit town via the south Exit Grid and return to your tent to drop off extra stuff, like Flint, Metal Parts, Fruit, jackets, guns and ammo, etc
- ✓At your tent, first click the Campfire and choose "Tent Management" and Upgrade" to build a basic Workbench (work mat)
- ✓Drop items into their respective piles, but keep your standard stuff: (Caps, Radio, Fibers, Tool, Combat Knife, Hatchet, Lighter, Molotov Cocktails, and any Stimpaks you may have so far
- ✓Also make sure you bring 1 9mm Mauser, and 1 Leather Helmet and 1 Leather Jacket. Drop other items off in their associated piles at your tent
- ✓Go back into town via the Market entrance and go into the Maltese Falcon bar and grill, and get the The Wasteland Band quest from Mick
- ✓With a Lighter, talk with Hope the Lounge Singer to begin her quest (open dialogue with her twice and always choose option 1)
- ✓Ask the bartender for the menu, and choose a food (1375 XP)
- ✓Then talk with the "Drunk" at the end of bar, and choose Gamma Gulp Beer, an item you'll need a little later, +110 XP
- ✓Go back to Old Town and tell that little girl the good news that you found her papa, 770 XP
- ✓Exit Old Town, enter the Police Station, speak with Sheriff Andrew Hayden about Hope. In dialogue with him, make sure to get the victim's name and occupation
- You must exit dialogue properly here for this quest to work right - get the above info and exit via the last dialogue option, "Thanks a lot..."
- ✓Speak next with Detective Cwan, and then with Detective Spade, get in a close call situation where a shot gets fired
- ✓Exit the Police Station and return to Beth in the Gun Store. Now you'll have a dialogue option to introduce yourself to Gun Store Beth. Follow that dialogue to advance the Into the Great Wide Open quest, +110 XP
- ✓From Beth, go to the General Store and introduce yourself to Mitch the Short Merchant, 137 XP
- ✓See what Mitch the Short Merchant is selling in the General Store, and buy 50 rounds of 9mm Ball ammo (not to be confused with regular 9mm) and 50 rounds of .44 Magnum JHP if he has those
- ✓Exit the General Store and run out west behind the bar to the clinic and speak with Doctor Burhnefletch to advance the Into the Great Wide Open quest, 82 XP
- ✓Speak with the doctor a 2nd time to get the The Anguished Man quest: dialogue options 1, 2, 1, 1, 1, 1, 1 etc, +1100 XP
![]() Level up! and choose Toughness and distribute Skill Points: Doctor 50 and 4 points left over (save for later)
Level up! and choose Toughness and distribute Skill Points: Doctor 50 and 4 points left over (save for later)
| Level 6 | Skills | Rep | 2/8 Primary Perks | 1/22 Support Perks | Quests | Notes |
|---|---|---|---|---|---|---|
107/287 HP 15k XP 6128 Caps 110 CW DR 05 PR 30 RR 20 PP 0/61 |
Small Guns 65 Close Combat 84 Throwing 40 First Aid 22 +Doctor 50 Lockpick 21 Traps 21 Science 50 Repair 50 Speech 5 Barter 4 Outdoorsman 150 |
Wanderer Hub 76 |
Adrenaline Rush +Toughness Even Tougher Lifegiver Lifegiver Bonus Rate of Attack Lifegiver Action Boy Crafting Professions: Small Guns 1 Doctor 1 |
Gecko Skinning Boneyard Guard Dead Man Walking Pathfinder Treasure Hunter Strong Back Pack Rat Light Step Explorer Scout Ranger |
Into the Great Wide Open Far Go Scout The Gun Runner Delivery A Tent in the Wasteland No Child Left Behind Find Joseph Hello City +The Wasteland Band +A Light in the Darkness +The Anguished Man Old Traditions Ol' Yeller |
It's hard to die as long as I'm only busy with such easy tasks. I hope other people are staying alive too. Active Goal: Exceed 17k Caps to buy a car |
| Legend: | + and bold = Skills recently boosted, and Quests recently added, Bold Skills = The 3 Skills you tagged at registration, Linked Blue Quests = Active/Incomplete Quests, Gray Text = content not yet discovered | |||||
- ✓While you're in the clinic, scav/rummage as needed (remember you need a total of 4 Leather Jackets to recruit for the gang), and see if you can open those locked containers, for more Items and XP
- ✓Run north from the clinic and enter the Post Office, talk with a Hubber, +1100 XP, +7 Hub Reputation, +1 Karma
- ✓Rummage the Post Office, exit, run south behind the Maltese Falcon toward the southwest Exit Grid which leads to The Heights
- ✓Return to Hub Heights, mention Doctor Burhnefletch to the "Hubber" in black leather standing in a pool of blood in the street, +1100 XP, +7 Hub Rep, +1 Karma
- ✓Speak with Billie twice to provide the items she needs to chase her dreams, 3300 XP, +30 Hub Rep, +1 Karma
- ✓Also in Hub Heights, find the Mean Thug Leader (Johnny) and talk tough with him, pay the fee, join his gang, agree to recruit more members - he gives you a black Leather Jacket
- Exit the Heights and return to your tent, drop all Crafting resources and leave behind whatever items you want to keep. Include a spare Radio
- Return to Hub Market and sell leftover items in the Gun Store for more Caps
- Next, find the Traveling Merchant near the water well in Hub's Market, and pay him for the hunting grounds location, 165 XP, -300 Caps
- Then go into the Maltese Falcon bar, and find the "Bunker Bar" in the basement (use the stairs in the room behind the bar tender)
- Speak with Vasquez the bar tender about the criminal investigation (Hope's quest)
- Recruit your first of 4 "Street Punks" in the back room of the Bunker Bar, by talking to him twice
- Exit the Bunker Bar and exit town, re-enter Old Town and speak with the old man "Hubber" in the L-shaped building, +1100 XP, +7 Hub Rep, +1 Karma
![]() Level Up Distribute Skill Points: Save all 29 unused Skill Points for now - they will be used soon for combat skills, but only after a free boost
Level Up Distribute Skill Points: Save all 29 unused Skill Points for now - they will be used soon for combat skills, but only after a free boost
| Level 7 | Skills | Reps | 2/8 Primary Perks | 1/22 Support Perks | Quests | Notes |
|---|---|---|---|---|---|---|
112/287 HP 23313 XP ~5700 Caps 110 CW DR 40 PR 30 RR 20 PP 0/61 |
Small Guns 65 Close Combat 84 +Throwing 51 First Aid 22 +Doctor 50 Lockpick 21 Traps 21 Science 50 Repair 32 Speech 5 Barter 4 Outdoorsman 150 |
Wanderer Hub 93 |
Adrenaline Rush Toughness Even Tougher Lifegiver Lifegiver Bonus Rate of Attack Lifegiver Action Boy Crafting Professions: Small Guns 1 Doctor 1 |
Gecko Skinning Boneyard Guard Dead Man Walking Pathfinder Treasure Hunter Strong Back Pack Rat Light Step Explorer Scout Ranger |
+The Great American Heist Into the Great Wide Open Hello City The Anguished Man The Wasteland Band Find Joseph The Gun Runner Delivery A Tent in the Wasteland |
+10 unused Skill Points I think I saved that singer's life! |
| Legend: | + and bold = Skills recently boosted, and Quests recently added, Bold Skills = The 3 Skills you tagged at registration, Linked Blue Quests = Active/Incomplete Quests, Gray Text = content not yet discovered | |||||
- While in Old Town, check with Jacob and see if has any .223 ammo in stock, and buy 50 rounds if he does
If you're short on resources to craft more Leather Jackets, then rummage as need to get more - you need to have at least 1 more for now, but a total of 3 more- Exit Old Town and return to the Police Station to report to Hayden you solved the mystery of who killed Hoyt, +1100 XP, +25 Hub Citizens, -25 Hub Criminals, +1 Karma
- Run south from the Police Station and enter Water Merchants, speak to the Hubber in the church about the doctor, +1100 XP, +7 Hub Citizens, +1 Karma
- Gladly don your new Leather Armor - it's in fresh condition at 100%, DR +30 and hang on to that .44 Magnum Revolver
- Return to the clinic out west and report the good news to the doctor, 1100 XP, +1100 XP, +7 Hub Citizens (and various other Reps), +1 Karma
- Run north fro the clinic back into the main street to the farm fields. Harvest as many Fibers as you can
- Then go into the small house on main street just north of the fields, and ask the Sad Dog Owner inside to tell you about Hub. Then speak with him again to give him some RadAway for his dog, +550 XP
- Gladly don your new Leather Armor Helmet Mark II - it's in fresh condition at 100% so now you might have a semi-matched set of leather armor in excellent condition
- Run up to the church, talk to the priest to complete Into the Great Wide Open, +550 XP, and speak with the priest again to get the Old Traditions quest
- At Hub's main entrance, find the carvan guard that wants 3 Stimpaks. Provide them, +660 XP
- Return to your tent and drop off misc items. You need to bring:
- All Caps, a Tool, Hatchet, Combat Knife, Radio, all weightless things you're gathering (Fibers, Broc and Xander)
- Also, your armor, Molotovs, Spiked Knuckles, some Stimpaks and a few other healing meds, and you can bring that Ripper too
- Plus, you need 1 HQ Alloy, 80 Fruit, and 50 Wood
- If you don't have an HQ Alloy yet, find one. Go Scavenging in Hub all over again if that's what it takes - find that item - it's worth some good XP in Junktown
- Head north 4 Zones to Junktown, use Town/World button to enter north, run thru the gate to the first building (Brewery), and speak with an owner 4 times to provide the requested materials, 2200 XP
![]() Level Up Distribute Skill Points: Save all 54 Skill POints for now!
Level Up Distribute Skill Points: Save all 54 Skill POints for now!
| Level 8 | Skills | Reps | 2/8 Primary Perks | 1/22 Support Perks | Quests | Notes |
|---|---|---|---|---|---|---|
117/287 HP 30k XP ~4,144 Caps 110 CW DR 40 PR 30 RR 20 PP 0/61 |
Small Guns 65 Close Combat 84 Throwing 40 First Aid 22 Doctor 50 Lockpick 21 Traps 21 Science 50 Repair 50 Speech 5 Barter 4 Outdoorsman 150 |
Wanderer Hub 224, Far Go 12 Junktown 14 Hub Criminals -25 Water Merchants 4 NCR 4, Rangers 4 Regulators 4 LA Scavs 4, FoA 4 |
Adrenaline Rush Toughness Even Tougher Lifegiver Lifegiver Bonus Rate of Attack Lifegiver Action Boy Crafting Professions: Small Guns 1 Doctor 1 |
Gecko Skinning Boneyard Guard Dead Man Walking Pathfinder Treasure Hunter Strong Back Pack Rat Light Step Explorer Scout Ranger |
A Tent in the Wasteland Optimizing the Power House The Inoperative Mr Handy Robot Old Traditions Hello City The Wasteland Band The Gun Runner Delivery A Tent in the Wasteland Find Joseph Junktown Brewery |
+35 unused Skill Points |
| Legend: | + and bold = Skills recently boosted, and Quests recently added, Bold Skills = The 3 Skills you tagged at registration, Linked Blue Quests = Active/Incomplete Quests, Gray Text = content not yet discovered | |||||
- From the brewery, run west to the boxing ring. Find Ronnie behind the Skum Pitt bar, and recruit him back into Mick's band, 275 XP
- Next, run far east past the hotel and find Boyce in the big building with the Workbench and a hoodless convertible car inside
- Buy Small Guns 1 Profession from Boyce, but DO NOT read the Small Guns skill book yet, -1500 Caps
- In the same building with Boyce, you see 2 Mechanics. Speak with a male mechanic near Sassy Givins to give away a Gamma Gulp, 550 XP and a Wrench, +7 Junktown Rep, +1 Karma
- Go to the WOrkbench and find another Mechanic there. Speak with him to give him that Wrench, 550 XP and a Tool, +7 Junktown Rep, +1 Karma
- Now speak with the female mechanic to give her a Tool, 550 XP and an Antidote, +7 Junktown Rep, +1 Karma
- Go next to the staggered building directly south of the Workbench/Mechanic's building, and help Sad Darion with that Antidote, 1100 XP
- Now run over west to the medical building and buy Doctor 1 profession from the doctor, and ask him about work to get a scorpion quest, and read the First Aid skill book, -1500 Caps, +6 First Aid skill
- Exit the south (main) gate to leave Junktown for now, but run straight west outside the gate to the tent and speak with Scout Captain Lex about his report for Far Go Traders
- Exit town back to The World map, for now ignore that new quest dot where scorpions would easily kill you, return to your tent and drop off misc items
- Exit your tent and head south to that little dot on the map, marked as "Lonely tent in the wasteland" - it's a tent with a farming family
- At their camp, avoid Hasso outside, but go inside the tent offer to help Evelyn, then exit to map again
- From there, pass up the other map dots for now, continue south to the Gun Runners which you should see highlighted in Boneyard, enter Gunrunners, +150 XP
- Go inside and tell Marshal you want training with Small Guns, +10 Small Guns skill
- Now read that Guns and Bullets skill book, and dump all 54 of your saved Skill POints into Small Guns, from 87 to 141, nice! Now you can start shooting stuff and kicking some ass
- Speak with Marshal again to progress on The Gun Runner Delivery deal with Jacob, "I'm coming from Jacob..."
- Choose dialogue options, "Jacob needs more ammo..." and "It's doubtful that it would hurt..." and "With Jacob as connection in the Hub..."
- If you do not see this last option, cancel dialogue (use ESC key) and try again - it might take over a dozen tries - it is apparently random
- Head farther south from Gun Runners to New Adytum and speak with Dyer Greenberg twice: once about his report for Far Go Traders and again to get the Salvagers' location
- Run down to their farm fields and gather as much Fiber as you can (max 60)
- Exit New Adytum and go to Salvagers which is now marked nearby on your map. Speak with the bald guard about finding Joseph (+550 XP), and get do another job moving boxes (+330 XP)
- Exit Salvagers, and go to the Library just north to speak with Nicole about her report for Far Go Traders
- Exit Library and head northwest to Tobacco Farm in Zone 26:43 and get as many Fibers as you can from 10 fiber stalks there
- Also while at Tobacco Farm, gather 76 Tobacco, put them in the crafting desk there, and use Science on it to make 38 Cigarettes
- When done there, Exit to map and you'll see 2 map dots; go to the one marked "Abandoned Farmhouse"
- Drink a Beer if you have any, arm yourself with Molotov Cocktails in Slot 1 and Spiked Knuckles in Slot 2, and enter the rat-infested farmhouse
- One fast way to clear this farm is to run straight into the house, open both interior doors as fast as you can, and exit immediately. By then the rats start chasing you - lead them down around the animal pen, and nuke 'em with molotovs
- Get them all chasing you at the same time, and toss a few molotovs back at them as you can. Once again watch for the completion message before you exit
- Go to Joe's rat quest location next, which might be called something generic like Desert 6 and be ready to kill rats with molotovs and that shotgun
- Before you enter the location, arm your molotovs and drink a Beer for extra toughness. You'll need to start immediately running away once you enter. Throw a molotov back at the rats when you can
- You can exit and re-enter this location as needed. If the rats swarm around and block you in, figure it out - use fire or your fists - beat dem ding-dang rats any which way you can, +1700 XP
- When it's done, you should get a completion message: "I've slaughtered the army of rats..."
![]() Level Up Choose Even Tougher and distribute Skill Points: Small Guns 155 and Close Combat 88
Level Up Choose Even Tougher and distribute Skill Points: Small Guns 155 and Close Combat 88
| Level 9 | Skills | Reps | 3/8 Primary Perks | 1/22 Support Perks | Quests | Notes |
|---|---|---|---|---|---|---|
122/287 HP 36k XP 8k Caps 110 CW DR 40 PR 30 RR 20 PP 0/61 |
+Small Guns 155 +Close Combat 88 Throwing 40 First Aid 28 Doctor 50 Lockpick 21 Traps 21 Science 50 Repair 50 Speech 5 Barter 12 Outdoorsman 150 |
Hub 259, Far Go 12 Junktown 64 Hub Criminals -25 Water Merchants 4 NCR 54, Rangers 4 Regulators 4, FoA 4 LA: Scavs 54, Citizens 50 Free Traders 50 |
Adrenaline Rush Toughness +Even Tougher Lifegiver Lifegiver Bonus Rate of Attack Lifegiver Action Boy Crafting Professions: Small Guns 1 Doctor 1 Big Guns Armorer Demolitions 1 |
Boneyard Guard Gecko Skinning Dead Man Walking Pathfinder Treasure Hunter Strong Back Pack Rat Light Step Explorer Scout Ranger Snakeater Educated Magnetic Personality Speaker Sex Appeal |
A Tent in the Wasteland Optimizing the Power House The Inoperative Mr Handy Robot Old Traditions Hello City The Wasteland Band The Gun Runner Delivery A Tent in the Wasteland Find Joseph Junktown Brewery Montag's Water Pump |
I feel Even Tougher now. This is going well... Now on to Junktown! |
| Legend: | + and bold = Skills recently boosted, and Quests recently added, Bold Skills = The 3 Skills you tagged at registration, Linked Blue Quests = Active/Incomplete Quests, Gray Text = content not yet discovered | |||||
- Return to your tent and drop off all those extra items weighing you down
- Go back to Hub, and return to the Sad Wife in Old Town to let her know you found her husband, although the news is not happy at all, +275 XP and +20 Hub Rep
- Also report back to Jacob about the deal with Gun Runners, +550 XP + a blueprint for Crafting and +50 Hub Rep
- From there, go back south to the Far Go Traders to hand over the information about his scounting reports, and thus complete the Hello City quest, +1320 XP, +12 Hub Rep and +1 Karma
- On your way to Exit town again, stop at the Travelling Merchant again and pay him the small fee to access the Gecko Hunting Grounds
- Return to your tent and get a Beer and your 12g Shotgun Shells - bring your molotovs too - drop off anything heavy that you don't need for combat
- Next let's get a Combat Shotgun. Hit the map, drink a Beer, go east to the gecko hunting location, and use your molotovs to kill the geckos, get their pelts, but avoid the fire gecko - fire does not hurt him
- From a distance, find the Star Trek "red shirt" guy near a fire gecko in the south, and get ready for a quick approach and stop in the correct hex where a Combat Shotgun lies hidden on the ground
- There on the ground near the red shirt guy, obscurred by a tree so you can't see it, is a Combat Shotgun - find that for sure!
- You might have to zoom in to find the red-shirt. Use your Z key and mouse wheel for this - grab that gun, reload, and kill that fire gecko asap
- Leave the (Meat behind - it is too heavy. Circling that green pond in the middle, there are 6 piles of various ammo, and make sure you find the gun - it's a 10mm SMG. Get all loot and kill all geckos, 2020 XP
- Return the farming family to let them know the good news: the rats are dead and they can go back to their farm
- As Evelyn and her family diappear, they leave some items behind for you to keep, including their tent
- Then you meet Cira and you talk with her to start the "main quest", Blood-Soaked Heroes, but something traumatic happens, +1100 XP
![]() Level Up! Distribute Skill Points: Doctor 75
Level Up! Distribute Skill Points: Doctor 75
| Level 10 | Skills | Reps | 3/8 Primary Perks | 2/22 Support Perks | Quests | Notes |
|---|---|---|---|---|---|---|
127/287 HP 45,493 XP 1800 Caps 110 CW DR 40 PR 30 RR 20 PP 0/61 |
Small Guns 155 Close Combat 84 Throwing 40 First Aid 28 +Doctor 75 Lockpick 21 Traps 21 Science 100 Repair 50 Speech 5 Barter 4 Outdoorsman 150 |
Hub 244, Far Go 12 Junktown 14 Hub Criminals -25 Water Merchants 4 NCR 7, Rangers 4 Regulators 4, FoA 4 LA: Scavs 4, Citizens 108 |
Adrenaline Rush Toughness Even Tougher Lifegiver Lifegiver Bonus Rate of Attack Lifegiver Action Boy Crafting Professions: +Small Guns 1 Doctor 1 +Big Guns 1 Armorer Demolitions 1 |
+Boneyard Guard Gecko Skinning Dead Man Walking Pathfinder Treasure Hunter Strong Back Pack Rat Light Step Explorer Scout Ranger Snakeater +Educated Magnetic Personality Speaker Sex Appeal |
A Tent in the Wasteland Optimizing the Power House The Inoperative Mr Handy Robot Old Traditions Hello City The Wasteland Band A Tent in the Wasteland Find Joseph Junktown Brewery Montag's Water Pump |
Ah finally some action! Now that's more like it. Still, i need more HP and that car... |
| Legend: | + and bold = Skills recently boosted, and Quests recently added, Bold Skills = The 3 Skills you tagged at registration, Linked Blue Quests = Active/Incomplete Quests, Gray Text = content not yet discovered | |||||
In Old Town, craft as many Leather Jackets as you need to have a total of 3 more in order to recruit street punks for the gang in The HeightsIn Old Town', find the Street Punk in the alley and recruit him into Johnny's gang- While in Hub's Old Town if you have a Metal Armor, sell to Jacob, and sell leftover Gecko Pelts back to travelling merchant in Market, +1000 XP and some Caps
- Exit Old Town and Scavenge the newspaper machine if you don't already have a Cat's Paw magazine
- Back at your tent, drop your armor and weapons and whatever you're carrying that has much weight, and assemble the following items into a pile:
- 50x Wood, 15x Junk, 30x Broc Flowers, 30x Xander Roots, 6x Electronic Parts, 60x Fibers, 20x Flint, 80x Fruit
- Except for the 50 Wood, do whatever you need to do to get these items ready to go
- Now with only a few basic items (Caps, Tool, Hatchet), head up toward the Junktown Mine just west of Junktown, and enter a random encounter near it, find some choppable trees and gather 50 Wood
- Once you have 50 Wood and everything else, walk over to the quarry (very close) and go into the building and speak with the supervisor to get work gathering resources (which you now already have)
![]() Level Up! Distribute Skill Points: Small Guns 167 and Close Combat 90
Level Up! Distribute Skill Points: Small Guns 167 and Close Combat 90
| Level 11 | Skills | Karma | 3/8 Primary Perks | 2/22 Support Perks | Quests | Notes |
|---|---|---|---|---|---|---|
132/287 HP 55k XP 14k Caps 110 CW DR 15 PR 30 RR 20 PP 0/61 |
+Small Guns 167 +Close Combat 90 Throwing 40 First Aid 22 Doctor 75 Lockpick 21 Traps 21 Science 50 Repair 50 Speech 5 Barter 4 Outdoorsman 150 |
Hub 256, Far Go 12 Junktown 14 Hub Criminals -25 Water Merchants 4 NCR 7, Rangers 4 Regulators 4, FoA 4 LA: Scavs 4, Citizens 100 |
Adrenaline Rush Toughness Even Tougher Lifegiver Lifegiver Bonus Rate of Attack Lifegiver Action Boy Professions: Small Guns 1 |
Swift Learner Boneyard Guard +Gecko Skinning Dead Man Walking Pathfinder Treasure Hunter Strong Back Pack Rat Light Step Explorer Scout Ranger |
The Wasteland Band Old Traditions Mr Handy Robot A Tent in the Wasteland |
|
| Legend: | + and bold = Skills recently boosted, and Quests recently added, Bold Skills = The 3 Skills you tagged at registration, Linked Blue Quests = Active/Incomplete Quests, Gray Text = content not yet discovered | |||||
STOP
As you exit Old Town, run north into the alley above Far Go Traders to find a Street Punk and recruit him into the gang too, and gather as much Fruit from the nearby apple tree (you'll need these Soon)Run south into Water Merchants district and find a Street Punk at the far south end of the area and recruit him into the gang, and also speak with a Hubber in the church about the doctor, +1100 XP and +7 Hub ReputationIf you have recruited all 4 gang members, then return to Hub Heights, and talk with Johnny about the next part of the plan (use dialogue option 2), 1100 XPJohnny tells you the gang needs to offer a bribe of 1200 Caps to the Sheriff - open dialogue with hin again to inform him you have itExit Heights and return to the Police Station - don't say much - just hand the bribe to him, and return to inform Johnny, +1100 XP- Head up toward Hub's main entrance, Scavenging along the way, and stop to report to Joe Kelly that you defeated the "army of rats", +385 XP
- Before you exit Hub, gather more Fruit at that apple tree just south of the main entrance, on the west side
- If you're over weight, drop some off at your tent, or go sell a few items to Gun Store Beth again, observing the same limits as before (keep 2 Radios, 2 Tools, 1 Combat Knife, all Leather Jackets, etc.)
- Exit Hub and go drop off extra items at your Tent. Drop your Leather Armor and helmet into a new pile with your molotovs and lockpicks
- Carry only your Caps, Tool, Hatchet, Combat Knife, and Fibers
- Return to the Workbench in Hub's Old Town and do the Rope Crafting/selling thing - you're short a few Caps for the next step
- Buy up to 8 of the Big Book of Science, read them all, and top off your Science skill at 100 so you can get the Educated Support Perk
- Return to tent, pick up your gear pile, don your armor and helmet, arm up with your Molotov Cocktails, grab a Beer, and let's head out
- Exit Old Town and run north to the little tent above Far Go Traders and speak with the Sad Farmer about the awful state of his farm overrun by monsters
- Now head out again north to the little "Farm" dot on the map, enter carefully and use whatever combination or molotovs and shotgun bursts you want, to kill all monsters there
- Some are hard to see and there's a basement with more - watch for the completon message - if you don't get it, maybe you missed a rat or one last spore plant, +6196 XP
- Report the good news to the Sad Farmer, +2750 XP
- Return to your Tent. You will need to carry a lot of weight, so drop your guns and armor and everything and bring only these things:
- Your standard tool kit: Caps, 2 Tools, Hatchet, your best knife, Radio, 1 Gamma Gulp and 1 Antidote if you have it
- Bring 160 Fruit, 20 Flint, 30 each of Broc Flower and Xander Root, 60 Fibers, 15 Junk, and 1 HQ Alloy
- As for 160 Fruit, you can find random fruit trees while looking for wood trees, and up to 60 Fruit from the 3 Fruit trees in Hub:
- 1 Fruit tree is near main gate behind a building, 1 is in Market area at the Old Town border, and 1 is in Market behind/west of Far Go Traders
- Scavenge for the HQ Alloy if you don't already have one
- Get the 15 Junk from either of the 2 "Hub Junk Barrels": one near Hub's main entrance, and one in Hub's Market entrance
| CHAPTER 2: (work in progress)... |
- Head north from Hub, and stop in the top left corner of Zone 30:37 to cut trees along the way to get 80 Wood (you will be overloaded)
- If you enter a populated/hostile encounter, run for the Exit Grid to escape combat - you're umarmed at the moment and we need to keep you alive!
- If you enter an encounter that has no choppable trees, just exit and re-enter the same map location to get a new encounter, but...
- Pick up Broc Flowers, Xander Roots, and Flint along othe way, as needed to have 30 flowers, 30 roots and 20 Flint
![]() Level Up! Choose Lifegiver and distribute Skill Points: boost _____, and Traps 26
Level Up! Choose Lifegiver and distribute Skill Points: boost _____, and Traps 26
| Level 12 | Skills | Reps | 4/8 Primary Perks | 2/22 Support Perks | Quests | Notes |
|---|---|---|---|---|---|---|
167/287 HP 66k XP 17k Caps 110 CW DR 15 PR 30 RR 20 PP 0/61 |
Small Guns 151 Close Combat 84 Throwing 40 First Aid 22 Doctor 50 Lockpick 21 +Traps 26 Science 50 Repair 50 Speech 5 Barter 4 Outdoorsman 150 |
Wanderer Hub 208, Far Go 12 Junktown -86 Hub Criminals -25 Water Merchants 4 NCR 7, Rangers -96 Regulators 4, FoA 4 LA: Scavs 4, Citizens 108 |
Adrenaline Rush Toughness Even Tougher +Lifegiver Lifegiver Bonus Rate of Attack Lifegiver Action Boy Professions: Small Guns 1 |
Swift Learner Boneyard Guard Gecko Skinning Dead Man Walking Pathfinder Treasure Hunter Strong Back Pack Rat Light Step Explorer Scout Ranger |
+Blood-Soaked Heroes The Wasteland Band Mr Handy Robot Old Traditions |
Mmmm, that Lifegiver perk feels good. |
| Legend: | + and bold = Skills recently boosted, and Quests recently added, Bold Skills = The 3 Skills you tagged at registration, Linked Blue Quests = Active/Incomplete Quests, Gray Text = content not yet discovered | |||||
- Exit the quarry and head over to Junktown, avoiding/exiting all encounters along the way
- Use the Town/World Button to enter Junktown via the north gate
- Go into the Skum Pitt bar and buy exactly 34 Nuka-Colas for later, -4000 Caps
- Find the Powerhouse southeast of the Skum Pitt (it is marked "high voltage"), and talk with Thomas the Junktown Technician to offer help fixing the generators and the robot in the back room, 27 XP
- Ask him for the Machine Parts needed to fix the Power House
- Go into the house just east of the hospital and near the small jailhouse, and give an Antidote to Sad Darion, 1100 XP
- If you do not have an Antidote, buy one in Darkwaters General Store, and give to Sad Darion
- Exit Junktown, head south, drop all items in a fresh pile at your tent, but keep your Caps on you, your Hatchet, 1 Tool, your best knife, and grab a Sledgehammer
- Return to Junktown Quarry and start mining heavy resources there: Iron Ore and Minerals - you will craft some Combat Shotguns to get one that does bonus damage, plus some Caps
- As you get overloaded, check your Carry Weight: you won't be able to run while carrying anything over 110 (weight units), you can still walk up to 220, so go ahead to get close to 220 before returning to your tent
- Once back to your tent, you can use the work mat to make Metal Parts and Alloys and Gunpowder, though you will need to hit the junk barrels in Hub for Junk
- When you have enough, walk 60 Metal Parts and 10 Alloys into Hub, cut 10 Wood, and use the Workbench in Old Town to craft 10 Combat Shotguns
- Keep any of them that have bonus damage, but sell the rest to Mitch in the General Store
- Repeat this process a few times, getting Junk from Hub, bring to work mat, go mining, bring to work mat, combine to make Metal Parts and Alloys, take to Hub and craft Combat Shotguns, keep good ones, sell remainder
![]() Level Up Distribute Skill Points: boost Small Guns to 161
Level Up Distribute Skill Points: boost Small Guns to 161
| Level 13 | Skills | Reps | 4/8 Primary Perks | 3/22 Support Perks | Quests | Notes |
|---|---|---|---|---|---|---|
| 142/287 HP 79k XP 18k Caps 110 CW DR 15 PR 60 RR 40 PP 0/61 |
Small Guns 161 Close Combat 84 Throwing 40 First Aid 27 Doctor 50 Lockpick 21 Traps 21 Science 50 Repair 50 Speech 5 Barter 4 Outdoorsman 150 |
Hub Criminals -25 Far Go 12, WM 1054, JT 14 Hub 894, LA Citizens 100 Commies 250, Tanker Ppl 250 Necrop Ghouls 250 |
Adrenaline Rush Toughness Even Tougher Lifegiver Lifegiver Bonus Rate of Attack Lifegiver Action Boy Professions: Small Guns 1 |
Swift Learner Boneyard Guard Gecko Skinning +Dead Man Walking Pathfinder Treasure Hunter Strong Back Pack Rat Light Step Explorer Scout Ranger |
The Wasteland Band Old Traditions Mr Handy Robot Blood-Soaked Heroes |
|
| Legend: | + and bold = Skills recently boosted, and Quests recently added, Bold Skills = The 3 Skills you tagged at registration, Linked Blue Quests = Active/Incomplete Quests, Gray Text = content not yet discovered | |||||
- You will need 10 Scorpion Tails for a quest, but if you have more than 10 then use them to craft Antidotes - you'll need these to survive the scorpion cave quest
- Arm yourself with a two of your new Combat Shotguns, Reload them both and switch them to "Burst" mode, don your armor and helmet, pick up your standard gear pile and drop that hammer in your tools pile
- Go back to Hub, return to the Maltese Falcon and let Mick know Ronnie is on board, 495 XP
- Speak with Hope on stage to officially "close the case" which saved her life, and you throw your hat onto the stage
- Head out and up to the scorpion cave map dot just abover Junktown, drink a Beer, and prepare to defeat these horribly poisonous scorpions
- Do not let them touch you! They will poison you so badly, it can bring your HP down too fast to recover, even with Stimpaks
- Kill the first 5 scorpions and craft 1 Antidote from the Scorpion Tails (Meat optional)
- Defeat the rest, being very careful inside the cave, but keep the tails - you need 10 of them soon, and recover the eggs, 968 XP
- Report back to Doc Larrikin to get both of these:
- Read that Scout Handbook for a permanent +6 boost to Outdoorsman skill (OD will show as 154, not 156 because boosting skills costs more when skill is over 100)
- Drop extra gear at your tent but pick up 10 Scorpion Tails and head south to Boneyard
- Visit New Adytum and harvest Fibers from the three active Fiber stalks there. This guide assumes you get 60/60
- Arm Tool in Slot 1 and speak with Montag about his water pump. Try to fix the pump, maybe 990 XP +Rep w/LA Citizens
- Exit to map, go to Salvagers which you can now see on the map thanks to Dyer Greenberg, talk with the bald Regulator to find Joseph, +550 XP
- Next, head to the Boneyard Train Station, and sell unneeded items to Taylor the Merchants to lighten your load, 150 XP
| Let's Ride the Train! |
- Buy two tickets to ride the train from the ticket seller in the train station, and then speak with the conductor nearby to board the train to San Francisco
- The train has to be present, parked in view for you to board it, so if it has not arrived yet, wait a bit. You can scavenge and rummage while you wait
- The train will arrive and be there for a short time to allow boarding. When it's about to leave, the conductor will start yelling out (in red text) to hurry up and board
- Boarding trains is done thru dialogue with a conductor, and this is your chance to choose the proper train:
- From Boneyard, one goes to SF, but one goes to Shady Sands, so be careful to board the right one (you want to go to SF)
- If you only get dialogue to board the wrong train, exit dialogue, wait 10 seconds and try again. The trains do not arrive at the exact same time
- Once aboard the train to San Francisco wait a few minutes if necessary for the train to depart - it will go to the next station with no stops
- Once you arrive in the SF train station, exit to The World map, walk over to the town, and go aboard the old tanker ship via the Town/World Button
- Find the bar on the ship and speak with Charlie about Mick and The Wasteland Band - he agrees to rejoin the band, 275 XP
- Exit the tanker, and run down the docks straight into town to the Chinese east gate, and go into the temple area
- In the nearest computer room, get the quest from Dr. Wong to Smoke Out the Ant Lair
- Exit the temple area, run across town to the Brotherhood of Steel's satellite location - stop and talk to the guard there - tell him you want to join
- If he approves you to enter, go in and speak with Paladin Windsted to get your first job task. Speak to him again to give him all 10 of those Scorpion Tails, 330 XP
- Speak with him again to get the next mission, and exit town thru the gate in the fence nearby
- From SF, go east to Mariposa Military Base in Zone 15:27. Go in and kill all of the wild dogs guarding the entrance - molotovs work well here, 726 XP
- Enter the base and find the broken computer on Level 1 - obtain as many eparts as you can from it. This guide assumes you get 25. Exit Mariposa back to the map
- From Mariposa, head north to the Ant Lair location, which varies from instance to instance
- Drink a Beer to up your DR a bit, arm your Combat Shotgun and any Molotov Coctails you still have, and enter the ant lair location
- Kill all of the ants, but be careful - they will swarm you and can knock you down more easily that you think, 1190 XP
- One method here is to shoot only a few and exit to map, then re-enter and repeat
- When done with the ants, you should get a quest completion message like, "I've killed all ants. I should go back to Dr. Wong..."
- Exit the Ant Lair location and head north to Zone 14:18 and enter Gordon's Gas Station and find Tamira
- Be very careful when speaking with her - if you do it wrong, she attacks you - just run out, re-enter, and try again to get the dialogue right
- Use these dialogue options: Who are you..., The way you hold..., For some benefit..., Now I wouldn't call this..., By now you could guess..., Spit on the ground..., I'm looking for someone..., You betchya!
- Exit the Gas Station and head straight north to Redding in Zone 14:11. Use Town/World to enter via the Mining district, and run over to The Last Gasp Saloon
- Enter the saloon and ask Josh what is it about this place? And ask about how best to bury people who have died, 2200 XP
- Check to verify your Carry Weight is 110
- Now from the saloon, head nextdoor to the Morningstar Mining Office and ask Dangerous Dan McGrew why they call him that, and watch for the Pack Rat response option, +30 to Carry Weight!
- Run east from there to exit the town back to the map, and
head to the Gecko Sanctuary in Zone 10:15 to kill some geckos - ready your Combat Shotgun Kill all of the geckos around the water there, but do not go north much - the monsters at the top of this location are too hard for you until you can shoot faster, 8567 XP- Exit to map, and head west to Navarro in Zone 3:16 - hopefully you don't get into Enclave encounters, but see if you can run run run out to escape if you do - this is why you have max Outdoorsman
- If you get killed by Enclave, it's because they know you just joined BoS and they will kill any BoS on sight
- Explore the regeneration location if you do get killed in this area - there is a Radscorpion Subway quest there
- Enter Navarro when you reach it, and spot the Nuka Cola Machine in the fenced-in area. Go back in that area and click the machine - it is the "supicious red device" the BoS wants you to find
- Watch for the message that the mystery has been solved, or get closer to the machine.
- Once you get the message, exit Navarro asap and walk south along the coast to Zone 8:22 to find and enter the Junkyard location
- Use Science skill on the broken computer there to obtain up to 25 more eparts. This is one of the two places where you can buy a working vehicle, but here you need a working Fuel Cell Controller
- When done here, exit back to map and hike over top of the bay and head for Zone 12:25 to enter the mine, get up to 25 more eparts in the building, and exit to map again
- Return to San Francisco, enter the main entrance, run back up northeast to the temple, and report back to Dr. Wong that you dfeated the ant lair, 770 XP
- Exit the temple, return to the BoS office and report about the red device, 825 XP
- Talk with the other BoS guy in there, the Quartermaster, and choose a weapon class (likely Small Guns) to get a few items. Speak again with Paladin Windsted to get your next assignment
- Exit town and return to the train station, board the next train when it arrives - it will be going back south to the Boneyard, but you will jump off before you get there!
- As the train approaches Zone 19:41, it goes thru 20:39. There, jump off the train by click+hold on your name in the Party List, drag menu down to left-arrow and release
- Head a few Zones south to Watwerworks in Zone 19:41, enter the location, hear the cool music, and harvest up to 75 eparts from 3 computers here - one is in the upper building
When done here, exit Waterworks and head east to Tobacco Farm in Zone 26:43 and get as many Fibers as you can from 10 fiber stalks there- Also while at Tobacco Farm, gather 76 Tobacco, put that in the crafting desk there, and use Science on it to make 38 Cigarettes
- Exit Tobacco Farm and head back up to your tent near Hub, drop off extra items, go into town via Old Town, get as many epart as you can, and now sell all eparts to Ferrarius, 11k XP!
- Exit Old Town and go north to gather as many more Fibers as you can get, then up to the church to report what you found in Redding, 3850 XP
- Run south back into the Maltese Falcon bar and report to Mick that another band member has agreed to re-join the band, 1265 XP
- Return to your tent and drop as much weight as you can including armor and guns/ammo (never drop Radio or Tool) and bring all those Fibers back to Old Town
- Craft Rope in batches of 48 this time (because you can carrry more now), and sell to Claire in batches of 12 in the center building again, maybe ~9999 XP (2728 XP per 48)
- STOP ***
| CHAPTER 3: Starting the "Main Quest" (by Corosive)... |
- Return to your tent. Remeber back in Hub Heights, Johnny and the Heist gang are still waiting on you; he gave you a long list of stuff to provide for the Heist...
- By now you have some of these items: a .44 Magnum Revolver, a 10mm Pistol, a 10mm SMG, some Shotguns, a Crobar, and some of the ammo too:
- You need 50 standard 12g Shotgun Shells, 50 rounds of .223 FMJ, 50 rounds of 10mm JHP, and 50 rounds of .44 Magnum JHP
- Buy whatever ammo you need to complete this ammo list, from Jacob or Mitch (If they do not have it, you might have to go to Boneyard Train Station or the merchant in Junktown)
- Use your Fix-Boy to determine what materials you need to craft that Hunting Rifle and upgrade a Shotgun to a Sawed-Off Shotgun
- Get what you need from your recource pile at your tent (or plan to Scavange for it), and gear up: don your armor, arm your weapons, get a few Beers and 40 smokes
- Return to the Workbench in Hub Old Town, and craft what you need for the gang
- If needed, talk to Johnny again to get a reminder about their guns-n-ammo shopping list. Bring the items to Johnny, provide the gear, 825 XP
- Talk to Johnny to find out which members have what strengths, and then choose Tactical Phase to run The Great American Heist, up to 1430 XP
- This is a dialogue mission where they put you in charge of the decisions. You have to assign each member to the right task for a successful outcome
- When you first see the outcome, if it's bad, you can cancel out of the dialogue, and try again for better results, by assigning people differently
- Back in Junktown, go to the large building in the upper right corner. The door is on the back side. Give smokes to The Hackler, 1650 XP +1200 Caps
- The next step requires some caution in dialogue. Please read the following points to avoid losing Caps:
- In the same building as The Hackler, you will speak with Frier about a medical examination challenge. It is possible to lose a lot of Caps (and some items) depending on how you reply in the subsequent dialogue
- To avoid losing your Caps, you could, for example, drop your Caps on the ground prior to opening dialogue with Frier - just make sure no players are around at this time, or they might steal your Caps
- Also, during the medical examination, you get urine samples from his kids. Do not "throw away" the urine - this can cause you to lose your Doctor's Bag
- When you're aware of the above cautionary points, find Frier in the same building as the Hackler, and talk with him about his family's healthcare needs
- With your Doctor's Bag, perform a few brief medical examinations for a total of 2200 XP
- Then run over to the Hospital and pay Doc Larrikin for basic medical training. Now you can craft your own Antidotes. Read that First Aid Book, +6 FA, -1500 Caps
- While in the clinic, ask the doctor about some work he needs done. This is the Black Claw scorpion quest so you'll need to use your best gun to live thru it
- Return to the power house and use the Robot Motivator on the My Handy robot - it might take several times to work, and report the good news to Thomas, 1100 XP total
- You get a Super Sledge blueprint here, from Thomas. Give the Machine Parts to Thomas and then "USE" eParts on the 3 generator machines, 1 each
STOP
- Drop extra stuff at your Tent before you go the scorpion cave - you need to carry their tails and eggs out, and the tails are heavy
![]() Distribute Skill Points: boost Small Guns to 165, Close Combat to 150, and Lockpick to 35
Distribute Skill Points: boost Small Guns to 165, Close Combat to 150, and Lockpick to 35
| Level 14 | Skills | Reps | 4/8 Primary Perks | 3/22 Support Perks | Quests | Notes |
|---|---|---|---|---|---|---|
147 HP 94k XP 20k Caps 110 CW DR 15 PR 60 RR 40 PP 0/61 |
Small Guns 165 Close Combat 84 Throwing 40 First Aid 28 Doctor 50 Lockpick 21 Traps 21 Science 50 Repair 75 Speech 5 Barter 12 Outdoorsman 150 |
Hub 258, Far Go 12 Junktown 174 Hub Criminals -25 NCR 54, NCR Rangers -96 LA Citizens 158 Necrop Ghouls 250 |
Adrenaline Rush Toughness Even Tougher Lifegiver Lifegiver Bonus Rate of Attack Lifegiver Action Boy Professions: Small Guns 1 |
Swift Learner Boneyard Guard Gecko Skinning Dead Man Walking Pathfinder Treasure Hunter Strong Back Pack Rat Light Step Explorer Scout Ranger |
+Iguana Pete's Missing Son +Collect the Radscorpion Eggs The Wasteland Band Old Traditions Blood-Soaked Heroes |
|
| Legend: | + and bold = Skills recently boosted, and Quests recently added, Bold Skills = The 3 Skills you tagged at registration, Linked Blue Quests = Active/Incomplete Quests, Gray Text = content not yet discovered | |||||
- Return to Hub, get and use a Mentats breath mint and talk with the iguana dealer in Hub's Market south. If you choose the right dialogue, you get a quest to find Iguana Pete's Missing Son
| CHAPTER 4: The Checkpoint for Travelling Abroad... |
- You've done well so far, staying alive while you're weak, and getting stronger for the fights ahead. You're about to head out on a long trek that takes you all over the northern areas of The World map
- Before leaving the Hub area to travel abroad, make sure you're wearing your leather armor and helmet
- Bring: 2 Tools, a Hatchet, a Knife, 2 Radios, 1 full Water Bag, 1 First Aid Kit, 2 Doctor's Bags, 1 Cookie, 1 Cat's Paw Magazine, 1 Gamma Gulp Beer, and 3 eParts
- Also bring: Combat Shotgun armed in Slot 1, Spiked Knuckles in Slot 2, some Beers, some Mentats, 1-3 Folded Tents
- Bring 34 Nuka-Colas which you either bought at the Skum Pitt, or you can buy one-at-a-time from the working vending machine in the Maltese Falcon
- Bring 17k Caps because you'll be buying a car soon for 15k Caps, and the excess will cover some other minor travel expenses
- Once you have these things, head east to Necropolis, enter Motel, talk with Thrane 1100 XP, Level Up
- Inside that building, talk with Krieger to give him 34 Nuka-Colas, 4400 XP
- Exit to map, arm your new Super Sledge in Slot 1, and move Spiked Knuckles to Slot 2
- Now enter Necropolis Watershed via Town/World function, run up the street to the sewer hole (there are two of these, so if it's blocked, try using the other one
- Drink a Beer, then kill all of the rats in the sewer there, +1061 XP
- Exit the sewer and get the message quest from Elmer. Read the data Tape ("USE" to upload to Pip-Boy Archives)
- Speak with the glowing ghoul near the water pump in back corner of Elmer's building to get Dead Man Walking
- Run to west room in Elmer's building, find hole in floor, go down into vault
- Use elevator to go to level 3, find a working computer, run the right program, send the data, 1100 XP
- Exit the vault, exit town to map, go to highlighted location nearby, defeat your attacker, 550 XP
- Exit to map, go north 12 Zones and east 3 Zones to Vault 15, enter vault, kill all rats inside, 1342 XP
- HINT: Stand in the vault door to bottleneck the rats so only 1 can bite you at a time
- Get at least 3 eParts either of the two computers here (or get them all), and notice there is a working Medical Terminal here as well
- Access working computer terminal (no need to use elevator) and run the program 1100 XP
- Exit to map, head straight west toward Shady Sands, but stop along the way to hunt Radscorpions and gather 10 Scorpion Tails in Zone 38:28
- To hunt an area, travel back and forth on The World map until you get encounters - then choose to go in, or skip them and keep searching
- Once you have 10 Scorpion Tails, go to Shady Sands, enter town (+150 XP) and talk with "Anxious Caravan Guards" to the right, to find who needs these things:
- One needs 3 eParts (660 XP), and one is an avid cat enthusiast so he needs a Cat's Paw Magazine (660 XP), and another needs a Doctor's Bag (660 XP)
- Then speak with Iguana Mikey at the iguana vending stand, about the search for "Son of Bob"
- Get fetch-quest from Buster, then find Thirsty Ronald behind Buster's tent, and give him your full Water Bag, 550 XP
- There is a little girl near Ronald. Give her a Cookie for 550 XP, and give a Gamma Gulp Beer to Floki, 550 XP
- Walk down into the Rawhide Saloon and give a First Aid Kit to Rollo 500 XP
- Speak with Mira twice to: get Buster's smokes, and agree to help Pay Back Mira's Debt
- Talk also with Nora to deliver a letter for her, and talk with Lenny about Son of Bob
- Go into town thru the main gate, head straight east (right) to the water pump building that has computers, but stop on the way to give a Doctor's Bag to Rickon, 500 XP
- Ask Dorothy the Engineer if she needs help with anything, and then talk to her again to deliver Nora's letter
- Walk down the street to the Brotherhood of Steel branch office, and Talk to the guard to be able to become an Initiate - your Gun Skill should be enough to get you in
- Now that you're a BoS member, you can enter their offices in various towns and report for duty, so go in and speak with Paladin Henrickson to get your first assignment
- If you brought 10 Scorpion Tails, you can provide them immediately for 330 XP and get your next assignment which takes you to Navarro, which is the Enclave's HQ
- Go into Dusty's Cantina and deliver Mira's debt money to Dusty
- Ask Dusty what's on the menu, and eat some bar food, +1375 XP
- In the bar, talk with Hoss the Badass to get Pathfinder but be careful in dialogue with him - he can attack you if you say the wrong thing
- Run west past the farm fields to the energy gate at the Westin Ranch. To get in, tell Grant the guard you heard Westin is hiring. Arm your Tool and fix the Water Pump there in the small pump house, +275 XP
- Exit the ranch and go into the medical research building above the hospital, and talk with Dr. Henry twice, ask about the NCR and get an assignment For Medical Science between Dr. Henry and Dr Jubilee
- Exit the medical research building and go to the "Hospital" to talk with Dr Jubilee about Dr. Henry's business proposal
- Report back to Dr. Henry to close the medical arrangement between him and Dr Jubilee, choose the RadAway as your reward and get +660 XP
- Run to the public toilet house behind the bar, and talk with Poor Dwayne who is in a lot of pain - say the right things to give him your RadAway, 1650 XP
- We're done her for now, so exit thru the town gate but stop in the police station on the way and speak with Detective Stark about solving more crime cases
- Run back out thru the city gate, go back to the Rawhide Saloon, report to Nora and choose the a Repair Tool (+220 XP), and report to Mira (+825 XP)
- Return to Buster on your way out of Shady Sands and give him those smokes, +880 XP and +300 Caps
- Exit to map, go nextdoor to NCR Train Station, talk with the Ranger Captain, +2200 XP and put on that new armor!
- From Shady Sands, hike 3 Zones west to their quarry and give 1 Tool and 1 Radio to Leurick at the bottom by some rocks 550 XP
- Travel northwest to Broken Hills in Zone 29:17, get Strong Back perk from Francis +23 Carry Weight
- Exit to map, go straight west to New Reno, and enter the Gas Station. Go inside and buy a Buggy from T-Ray. Congrats! Your new car appears in the garage!
- Click your Buggy to take off and drive straight west for Gordon's Gas Station in Zone 14:18
- Notice you now have a car key in your Inventory. Be careful not to move that key into the trunk of your vehicle - it can get locked inside, and you'll need someone with high Lockpick skill to open it
- Also notice your vehicle has fuel and a general mechanical condition. Fuel gets used as you drive, and the car's condition deteriorates too.
- When parked somewhere, use Science skill on a vehicle to see it's status. Add batteries to charge it up (refuel it), and use a Repair Tool on it to keep it in good running order
- Your ability to fix your own car will be tied directly to your Repair skill, so expect to break Tools until your Repair is higher
- IMPORTANT: If you ever are parking a car and accidentally get into a populated encounter, click the car immediately to exit and try again - otherwise get caught in unplanned combat
- Park next to Gordon's Gas Station in an empty random encounter, run in and speak carefully with Tamira to get the Ranger Support Perk
- Optionally you can park inside public locations and your vehicle should have theft protection for a short time, preventing other players from absconding with your car
- Diaogue options to avoid being attacked by Tamira: 11112121 (Who are you? The way you hold..., For some benefit..., Now i wouldn't call this..., Spit on the ground, I'm looking for someone..., By now you can guess..., You betchya!)
CHECKPOINT
- What you do next depends on what time it is. Click P to open Pip-Boy and check the time. If it's daytime hours, go to Vault City first, and then hunt Brahmin near Modoc to make more Folded Tents
- If however, it is no longer daytime hours, go hunt Brahmin around Modoc first, and hit Vault City after 8am (skip down to that section first, and do the next two sections in reverse order)
Daytime Hours: Go to Vault City
- Drive to Vault City during daytime hours, and use a Folded Tent to build a Safe House parking place mid-way between Vault City and Gecko
- Press P to verify the time in your Pip-Boy. You can get a Day Pass and then get past the closed gate, starting at 8AM
- Don't try to pass thru the gate without a Day Pass - the guards will kill you! You're not a member here, so always make sure you have your Day Pass when going thru this gate
- If it's nighttime hours and you have to delay going to Vault City, you can either wait a bit, idle on the map, Scavenge in town, or go elsewhere and return later. No worries either way
- In Vault City, enter the tiny building on the right, go past Skeev and and get a Day Pass from Wallace. Now you get a better greeting from the gate guard as you approach the gate, and you can enter
- Run up to the "Corrections Center" and ask Sergeant Stark about raiders to get Scout, a great Support Perk
- Go into the tiny building behind the FLC Bank, where Khol works, and access the computer terminal there. Read your email. You might need to leave in a hurry, 2200 XP
- Visit the clinic on the way out of town, and get the Medical Investigation quest from "Doc" Andrew, and then exit town
- Visit Gecko just to the north and enter via the Scrapyard entrance, find Skeeter and talk with him twice:
- Return to Buggy and drive northwest to Modoc in Zone 20:5, park in a random encounter between the town and Ghost Farm, and use a Folded Tent to build your next Safe House
- Notice your tent is not exactly a tent! Ranger means you get Safe Houses, which have their own Workbench for Crafting. Nice!
- Use this new Safe House at Modoc as a staging point for building more Folded Tents. Hunt all around the town, within 2 zones until...
- If you have not been to Vault City and Gecko yet, then hunt until daybreak and then go there, or...
- If you have already been to Vault City and Gecko, hunt Brahmin and harvest Brahmin Hides until you have 3 more Folded Tents
- Cut Fibers in Modoc so you can craft Ropes for more Folded Tents, and cut trees in Modoc for Wood so you can make Sharpened Poles
CHECKPOINT
- Proceed to next steps only if you've done both: been to Vault City/Gecko and hunted Brahmin around Modoc
- Otherwise, go do whichever one of these you have not done yet (above)
Proceeding After Visiting Modoc and Vault City and Gecko
- Go straight west from Modoc and find Den. Park next to town, and use a Folded Tent to set up your next Safe House
- Arm yourself with a Tool (or a Super Tool Kit if you have one) and go in via Downtown
- Go into Becky's casino and ask Becky about fixing her game table. Arm your best repair Tool in Slot 1, and use your Repair skill on the table closest to the door
- Report back to Becky that her table is fixed, 990 XP and exit back to the map
- Re-enter Den via the East Side, run up into Mom's Diner and ask her what's on the menu - choose a bar food (1375 XP) and exit, return to your car and head northwest to uncover Klamath
- No need to stop yet at Klamath, but uncovering this town will allow you to get another Support Perk which makes map travel a little easier
- From Klamath, drive south by southwest along the coast to Zone 3:16 to find Navarro. Park in an empty random encounter and go into Navarro
- There at Navarro's entrance is a building with a gated area behind it. Go into that gated area to disover the mysterious red object. You'll know if you find it when you get the right text message
- As soon as you solve that little mystery, exit Navarro and go back to your car
- Return to Buggy and drive northeast to find Redding in Zone 14:11, and park next to town
- Enter Redding via the Mine entrance, and go into the Last Gasp Saloon. Ask Josh Laurance about how to properly bury the dead, 2200 XP
- Head nextdoor to speak with Dangerous Dan McGrew and get the Pack Rat Support Perk, +38 CW
- In the Mine area, go talk with a mysterious stranger in one the three tents there, 1320 XP, Level Up
![]() Choose Lifegiver and distribute Skill Points: boost Small Guns to 171 and Repair to 63
Choose Lifegiver and distribute Skill Points: boost Small Guns to 171 and Repair to 63
| Level 15 | Skills | Reps | 5/8 Primary Perks | 4/22 Support Perks | Quests | Notes |
|---|---|---|---|---|---|---|
182 HP 105k XP 5k Caps 133 CW DR 15 PR 60 RR 40 PP 0/61 |
Small Guns 171 Close Combat 84 Throwing 40 First Aid 28 Doctor 50 Lockpick 21 Traps 21 Science 50 Repair 63 Speech 5 Barter 4 Outdoorsman 150 |
Hub Criminals -25 Far Go 12, WM 1054, JT 14 Hub 894, LA Citizens 100 Commies 250, Tanker Ppl 250 Necrop Ghouls 250 |
Adrenaline Rush Toughness Even Tougher Lifegiver +Lifegiver Bonus Rate of Attack Lifegiver Action Boy Professions: Small Guns 1 |
Swift Learner Boneyard Guard Gecko Skinning Dead Man Walking +Pathfinder Treasure Hunter Strong Back Pack Rat Light Step Explorer +Scout +Ranger |
+Deliver Message for Elmer +Love, or Something Like It +Buy Cigarettes for Buster +Pay Back Mira's Debt +For Medical Science +Brotherhood of Steel: Welcome... The Wasteland Band Old Traditions Blood-Soaked Heroes |
Rad Resistance 60 w/CA2 |
- Return to your car, drive south along the coast to find San Francisco in Zone 9:25. Park near town and use a Folded Tent to set up a Safe House
- Now walk into town and use the Tanker entrance, find Charlie in the bar in the back and recruit him back into Mick's band, 275 XP (notice there are some Merchants here)
- Exit the tanker, and find the Exit Grid straight to the far west, just in from the dock, and re-enter town via the main entrance
- Run straight west and find a gate in the fence. You're a BoS member now, so go straight into the BoS field office and report to Paladin Windsted about the red object
- Then talk to the other BoS guy there, the Quartermaster. He'll explain a few things about membership and direct you to Lost Hills from now on, but talk again with Paladin Windsted for your next assignment, 825 XP
- Paladin Windsted will give you your next assignment, which is your choice of two scouting missions
- Before you return to your car, visit the San Fran Train Station nearby and talk with 4 people there about the Medical Investigation
- Return to your car and drive back to your Safe House at Ghost Farm, park there and go into Ghost Farm to investigate for the BoS
- Return to your car and drive to your Vault City/Gecko Safe House. Go into Vault City (during daytime hours only) and make sure you are carrying your Day Pass
- If daytime, go thru the gate and into the FLC Bank to speak with Councilwoman McClaire. She sends you to talk with Bishop in the Sharks Club in New Reno
- Drive to New Reno, enter 2nd Street, and pay to get into the Sharks Club. Find stairs and go up 2 floors to find Bishop. Speak with him briefly and exit the club, exit town, return to car
- Find the new random dot on your world map to the west in the desert, but park next to it. Get ready for a fight - drink some beer and arm up with your favorite weapon
- Go into the quest location - you're attacked by 3 vault dwellers - none of them explain anything - they just attack and they do mean business. Defeat them and watch for a txt message about where to go next, 1650 XP
- Drive back to Vault City and enter with your Day Pass during daytime hours only), and talk again with Councilwoman McClaire in the FLC Bank, 2750 XP, Level Up
![]() Distribute Skill Points: boost Repair to 73, and Lockpick to 50
Distribute Skill Points: boost Repair to 73, and Lockpick to 50
| Level 16 | Skills | Reps | 5/8 Primary Perks | 4/22 Support Perks | Quests | Notes |
|---|---|---|---|---|---|---|
187 HP 120k XP 5k Caps 171 CW DR 15 PR 60 RR 40 PP 0/61 |
Small Guns 171 Close Combat 84 Throwing 40 First Aid 28 Doctor 50 Lockpick 21 Traps 21 Science 51 Repair 73 Speech 5 Barter 12 Outdoorsman 150 |
Hub Criminals -25 Far Go 12, WM 1054, JT 14 Hub 894, LA Citizens 100 Commies 250, Tanker Ppl 250 Necrop Ghouls 250 |
Adrenaline Rush Toughness Even Tougher Lifegiver Lifegiver Bonus Rate of Attack Lifegiver Action Boy Professions: Small Guns 1 |
Swift Learner Boneyard Guard Gecko Skinning Dead Man Walking Pathfinder Treasure Hunter Strong Back Pack Rat Light Step Explorer Scout Ranger |
+Medical Investigation The Wasteland Band Blood-Soaked Heroes Brotherhood of Steel: Welcome... |
CW + to 171 |
- Return to Redding and speak again to the strange man in the tent, in the mining district, 1320 XP
- Drive back to your Hub Tent and visit Necropolis on foot - speak with Elmer to complete his message quest, 3000 XP
- Next, walk from Necropolis to the Library in the LA Boneyard, south of Hub and speak twice with Katrina, 4400 XP
- While in LA, visit the LA Train Station and talk with 4 people there about the Medical Investigation, 150 XP
- Return to Hub, enter Market district, and talk with Mick in the bar to progress on his band quest, 1265 XP
- Next, go into the Post Office and speak with the main guy there about sending a letter (tell him you have a book). Follow dialogue through, 2750 XP
- Exit the post office and run north back to the church with the graveyard, report to the priest about what you learned regarding burying the dead, 2750 XP, Level Up
![]() Distribute Skill Points: boost Repair skill to 97
Distribute Skill Points: boost Repair skill to 97
| Level 17 | Skills | Reps | 5/8 Primary Perks | 8/22 Support Perks | Quests | Notes |
|---|---|---|---|---|---|---|
192 HP 136k XP 9k Caps 171 CW DR 15 PR 60 RR 40 PP 0/61 |
Small Guns 171 Close Combat 84 Throwing 40 First Aid 28 Doctor 50 Lockpick 21 Traps 21 Science 50 Repair 98 Speech 5 Barter 4 Outdoorsman 154 |
Hub Criminals -25 Far Go 12, WM 1054, JT 14 Hub 894, LA Citizens 100 Commies 250, Tanker Ppl 250 Necrop Ghouls 250 |
Adrenaline Rush Toughness Even Tougher Lifegiver Lifegiver Bonus Rate of Attack Lifegiver Action Boy Professions: Small Guns 1 |
Swift Learner Boneyard Guard Gecko Skinning Dead Man Walking Pathfinder Treasure Hunter Strong Back Pack Rat Light Step Explorer Scout Ranger |
Brotherhood of Steel: Welcome... Blood-Soaked Heroes |
-STOP-
- Now go to the Water Merchants district, and speak with Mere to get a job driving Water Barrels to 3 towns (Broken Hills, Den, an San Francisco) and agree to take all 3 barrels at once
- Bring 2 more Folded Tents if you have them, and go to Broken Hills and park in an emtpy encounter right next to the town. Use a Folded Tent there to create another parking place
- Run into town, down the main street just past the open well, and deliver a Water Barrel to Marcus, 1320 XP
- Exit town, return to car and drive to Modoc, park near Ghost Farm and run into Ghost Farm to see it's all dead there. Get text message about it, and exit back to car
- Drive to Den next, set up another Safe House next to town, enter town via East Side, run into the The Hole saloon, and deliver a water barrel to Frankie, 1320 XP
- Drive to SF next, and run into the first building on the left in the main square, and deliever the last Water Barrel to Lao Chou, 1320 XP
- Use the rear door in Lao Chou's building to go to the BoS field office through the brahmin pen. Enter the BoS bunker and report to Paladin Windsted again, and get your next assignment
- Drive to area around Mariposa Military Base. You may have to circle the base a few times to find the site where the squad fought some mutants. It's a ghastly scene
- One of the dead soldiers has a Super Stimpak. Find that and use your Doctor skill on Snyder to open dialogue. Do that again to complete this task - he never actually stands up, but says let's go (overhead text)
- Remember your car is in that location, so once you've helped Snyder, run back north to get tour car and drive back to SF to report again to Paladin Windsted for your next assignment, 825 XP
- Return to Hub and get paid by Mere in Water Merchants and pick up another 3 Water Barrels to deliver, 3300 XP
- You're often Overweight at this point, so slow-walk back to your car, drop misc items somewhere, and repeat the water delivery route for more XP
- Drive to Broken Hills again and deliver a Water Barrel for 1320 XP, and see Brian on the way out (last building near Exit Grid) and pay him for a new Profession: Energy Expert 1!
- ---Read your Science Skill Book +6 Science skill---
- Run down into the main part of Gecko and find Keith in The Harp bar to recruit him back into Mick's band, 440 XP
- While in the bar, buy 1 Roentgen Rum from Wooz
- Visit the Vault City Train Station (150 XP) and talk to 4 people in there about the Medical Investigation
- Deliver next Water Barrel to Frankie in The Hole at Den, 1320 XP
- Delivery last Water Barrel to Lao Chou in SF again, 1320 XP
- Visit the San Francisco Train Station and speak with 4 people there about the Medical Investigation
- Return to Hub, park car and go on foot over to Necropolis to deliver the return message from Skeeter to Elmer in Watershed, 3300 XP + 1 Geiger Counter
- Walk down to the Boneyard Train Station an speak with 4 people there about the Medical Investigation, 150 XP
- Walk back to Hub and enter Market, go tell Mick the good news about the band, 1650 XP
- Go to Hope, the Lounge Singer on stage, and catch your old Fedora hat (this allows you to continue with criminal cases for the Shady Sands police department)
- Return to Mere again for another run of water barrels, 3300 XP
- Drive to Shady Sands, park somewhere near the NCR Train Station, go in there and speak with 4 people about the Medical Investigation, 150 XP
- Deliver a Water Barrel to Marcus again in Broken Hills, 1320 XP
- Park near Vault City, report to "Doc" Andrew about the Medical Investigation, 4125 XP
- Use your Day Pass during daytime hours to get past the gate in Vault City, and deliver the letter to Councilwoman McClaire in the FLC Bank, 1320 XP
- Deliver water barrel to Frankie in Den again, 1320 XP
- Delivery last Water Barrel to Lao Chau again in SF, 1320 XP
- By now you're nearly overdue in repairing your vehicle, so get a Tool, put it in Slot 1, and use it on your Buggy. Use Science on the car to check it's condition now
- Return to Hub, park at your Tent, go into the Book Store in Hub's Market, and buy 2 Electronics Books. Read those to get Repair skill maxed at 125
- Return to Mere for payment, and get another set of Water Barrels - you're almost to Level 18 when you can get Bonus Rate of Attack, a very important perk, 3300 XP
- Make another round of Water Barrel deliveries to the same 3 towns: Broken Hills, Den, and San Francisco, and report back to Mere for a total of 7260 XP
- Repeat as needed to reach Level 18 - some challenges are waiting for you to get tougher and the level 18 perk is a big help, Level Up
![]() Choose Bonus Rate of Attack after you distribute Skill Points: Small Guns 180, Repair to 120, and Lockpick 32
Choose Bonus Rate of Attack after you distribute Skill Points: Small Guns 180, Repair to 120, and Lockpick 32
| Level 18 | Skills | Reps | 6/8 Primary Perks | 8/22 Support Perks | Quests | Notes |
|---|---|---|---|---|---|---|
197 HP 153k XP ?? Caps 171 CW DR 15 PR 60 RR 40 PP 0/61 |
Small Guns 181 Close Combat 140 Throwing 40 First Aid 22 Doctor 50 Lockpick 32 Traps 21 Science 52 Repair 120 Speech 5 Barter 4 Outdoorsman 154 |
Hub Criminals -25 Far Go 12, WM 1054, JT 14 Hub 894, LA Citizens 100 Commies 250, Tanker Ppl 250 Necrop Ghouls 250 |
Adrenaline Rush Toughness Even Tougher Lifegiver Lifegiver +Bonus Rate of Attack Lifegiver Action Boy Professions: Small Guns 1 |
Swift Learner Boneyard Guard Gecko Skinning Snakeater Dead Man Walking Pathfinder Strong Back Pack Rat Scout Ranger |
Blood-Soaked Heroes Brotherhood of Steel: Welcome... |
-STOP-
- (Add Vault City Courier Services here)
- Run up to trappers near the burning barrel, and ask a child there about Light Step perk
- Run south through the building and speak with Meloy inside to get Toxic Caves location, but exit dialogue early - before tanker quest
- Have Grisham exchange 20 Meat for 10 Jerky (go hunt some brahmin nearby to get meat if necessary)
- From Modoc, drive straight south to New Reno in Zone 20:18, and enter 2nd Street and go into the Shark's Club
- Inside the Shark's Club, use the stairs to go up 2 floors, talk with Bishop, then exit New Reno to map
- Drive west into desert to new map location, and park the car nearby
- Drink a beer if you have one, arm best HtH weapon to Slot 1, and go into quest location, defeat your enemies 1650 XP
- Now find the location you got from Merk, to fight the Black Wipestress, which should also be not far from New Reno, maybe to the east
- Park car there, go there and defeat The Wipestress. Return to Merk at Shady Sands 1550 XP
- It's time to head home - return to Buggy, and drive back to Hub, park at your Hub tent
- 5 Iguana-on-a-stick, 12 Broc, 6 Xander, 3 Fruit, 2 Filled Water Bags, and 1 Roentgen Rum
- Go into the Hub Post Office and speak with the Hub Chef about You Call This Soup?
- After delivering water to San Fran, park at your Hub tent, and go south to Library to speak with Katrina 4400xp
- Run north up to Post Office and talk to Head Postman about the book. Then check your mail 2750 XP
- Return to your Hub tent, get all Metal Armors you have been being paid to do water runs, and sell them to Jacob in Hub Old Town
- Stop at Book Store when convenient, and buy additional Skill Books - you can read up to 10 of each
- Read only as many Scout books as needed to get your Outdoorsman skill maxed at 175
- Read 10 Small Guns and First Aid books next, to boost that skill so you can do some heavier fighting
- Your Repair is already nearly maxed, but try reading 1 or 2 Electronics books to get it to 125
- Read only as many Science books as it takes to max your Science skill at 125
- Read 10 Barter books to optimize profits from Barter runs
- Go to Water Merchants, and continue with water deliveries to finance the rest of your Skill Books
- Also stop in the NCR Train Station and speak with Mantis the Ghoul to get Explorer 275 XP
- Now you can see the entire world map!
![]() Distribute Skill Points: wip
Distribute Skill Points: wip
| Level 19 | Skills | Karma | Perks | Quests | Notes |
|---|---|---|---|---|---|
| 202 HP 172k XP ?? Caps 171 CW DR 15 PR 60 RR 40 PP 0/61 |
Small Guns 181 Close Combat 140 Throwing 40 First Aid 22 Doctor 50 Lockpick 32 Traps 21 Science 52 Repair 120 Speech 5 Barter 4 Outdoorsman 154 |
Hub Criminals -25 Far Go 12, WM 1054, JT 14 Hub 894, LA Citizens 100 Commies 250, Tanker Ppl 250 Necrop Ghouls 250 |
Adrenaline Rush @ Level 3 (or Quick Recovery @ Level 3) Toughness In Your Face! Even Tougher Lifegiver Bonus Rate of Attack Lifegiver (your choice) 9/22 Support Perks Profession SG1 |
Blood-Soaked Heroes Brotherhood of Steel: Welcome... |
- (more here)
![]() Distribute Skill Points: wip
Distribute Skill Points: wip
| Level 20 | Skills | Karma | Perks | Quests | Notes |
|---|---|---|---|---|---|
| 207 HP 191k XP ?? Caps 171 CW DR 15 PR 60 RR 40 PP 0/61 |
Small Guns 181 Close Combat 140 Throwing 40 First Aid 22 Doctor 50 Lockpick 32 Traps 21 Science 52 Repair 120 Speech 5 Barter 4 Outdoorsman 154 |
Hub Criminals -25 Far Go 12, WM 1054, JT 14 Hub 894, LA Citizens 100 Commies 250, Tanker Ppl 250 Necrop Ghouls 250 |
Adrenaline Rush @ Level 3 (or Quick Recovery @ Level 3) Toughness In Your Face! Even Tougher Lifegiver Bonus Rate of Attack Lifegiver (your choice) 9/22 Support Perks Profession SG1 |
Blood-Soaked Heroes Brotherhood of Steel: Welcome... |
- (more here)
![]() Choose Lifegiver and distribute Skill Points: wip
Choose Lifegiver and distribute Skill Points: wip
| Level 21 | Skills | Karma | Perks | Quests | Notes |
|---|---|---|---|---|---|
| 212 HP 210k XP ?? Caps 171 CW DR 15 PR 60 RR 40 PP 0/61 |
Small Guns 181 Close Combat 140 Throwing 40 First Aid 22 Doctor 50 Lockpick 32 Traps 21 Science 52 Repair 120 Speech 5 Barter 4 Outdoorsman 154 |
Hub Criminals -25 Far Go 12, WM 1054, JT 14 Hub 894, LA Citizens 100 Commies 250, Tanker Ppl 250 Necrop Ghouls 250 |
Adrenaline Rush @ Level 3 (or Quick Recovery @ Level 3) Toughness In Your Face! Even Tougher Lifegiver Bonus Rate of Attack Lifegiver (your choice) 9/22 Support Perks Profession SG1 |
Blood-Soaked Heroes Brotherhood of Steel: Welcome... |
-STOP-
- You need to craft a sledgehammer next, so Scavenge around Hub enough to find 1 Wood and 1 Metal Part
- Exit Hub and go to your Safe House at Junktown mine, drop all gear except Radio, craft 1 Sledgehammer, and hit the mine
- Work the mine until you have 60 or more Iron and 60 or more Minerals, and return to your Safe House
- You will be overweight - that's okay - you don't have far to go
- You'll probably be short on Junk here, so go into Hub and gather Junk from the barrels
- Need Wood? Grab a hatchet and go into randoms in Zone 29:36 just a few pixels away until you find the right trees
- After you're done buying Skill Books, amass 15k extra Caps to get additional crafting professions:
- Talk with Boyce in Junktown to pay for the 2nd level of Small Guns professional training
- Go to Salvagers for Armorer 1 & 2
- Brian in Broken Hills for Energy Weapons 1 & 2
- Junktown doctor for Doctor 1 & 2
- Dangerous Dan in Redding for Demolitions Expert 1
-STOP-
- You are getting ready to go hunt random lockers, and find loot including Skill Books and Blueprints
- Locker Hunting is smooth with Light Step (Traps 50), Doctor 100, and Lockpick 125 or more
-STOP-
- Rail Line Gang
- Klamath Tanker
- Restore Hope to a Sad Farmer
- Find William's Daughter
- California Raiders
- Other than Blood-Soaked Heroes, you've completed most of the easier quests
-STOP-
- Go to Powerhouse, talk with Thomas about optimizing the Powerhouse (need a part from Boyce)
- and ask Boyce about the part for Thomas - he gives it to you for free
- Return to the Powerhouse to give the part to Thomas, and use 1 epart on each of the 3 generators in the back room:
- Repair the 3 generators by using an epart on each one
- Then optimize each generator by using/re-using your Science skill over and over until success
- Then click the power switch on each generator to power it up
- Report back to Thomas the good news about the generators working again 1375xp +Caps
-STOP-
- As you search and scavenge, bring stuff back to your tent and build the following 4 piles of items:
- Quest Pile #4: 10 Meat Jerky, 5 Iguana-on-a-stick, 12 Broc, 6 Xander, 3 Fruit, 2 Filled Water Bags, and 1 Roentgen Rum